Autentificarea în ANAF SPV, pe Linux si MacOS, din Firefox, cu certificat pe token

Site-ul ANAF ne întâmpină cu mesajul că facturarea electronică prin e-Factura este obligatorie de la 1 ianuarie 2024. Când vine vorba de ANAF, suportul pentru chestiile astea e mai complicat pe Linux sau MacOS.

Acest articol este o continuare a articolului precedent în care am exemplificat cum se poate realiza autentificarea din Chrome, pe Linux

Token-ul și Semnătura Digitală

Voi folosi același kit cu CryptoID de la CertDigital. Acel mToken Crypto ID este făcut de LONGMAI. Descărcați de la ei de pe site:

... pentru Linux, respectiv MacOS.

Aplicația de semnat documente e scrisă în Java și e simplu de folosit. Știe să găsească token-ul atașat calculatorului, să-i ceară PIN-ul și, apoi, să semneze cu semnatura de pe token o listă de PDF-uri pe care o selectezi.

Autentificarea în SPV, pe Linux, cu Firefox

Pașii de mai jos nu funcționează dacă Firefox e instalat din snap. Există un bug deschis la Snapcraft pentru asta și altul la Mozilla. Pentru că folosesc Kubuntu, am instalat Firefox din apt repository-ul celor de la Mozilla (deci dintr-un .deb). Nu am testat cu Firefox instalat din Flatpak.

Aplicația CDP Client ne dă un indiciu despre unde se află librăria lui:
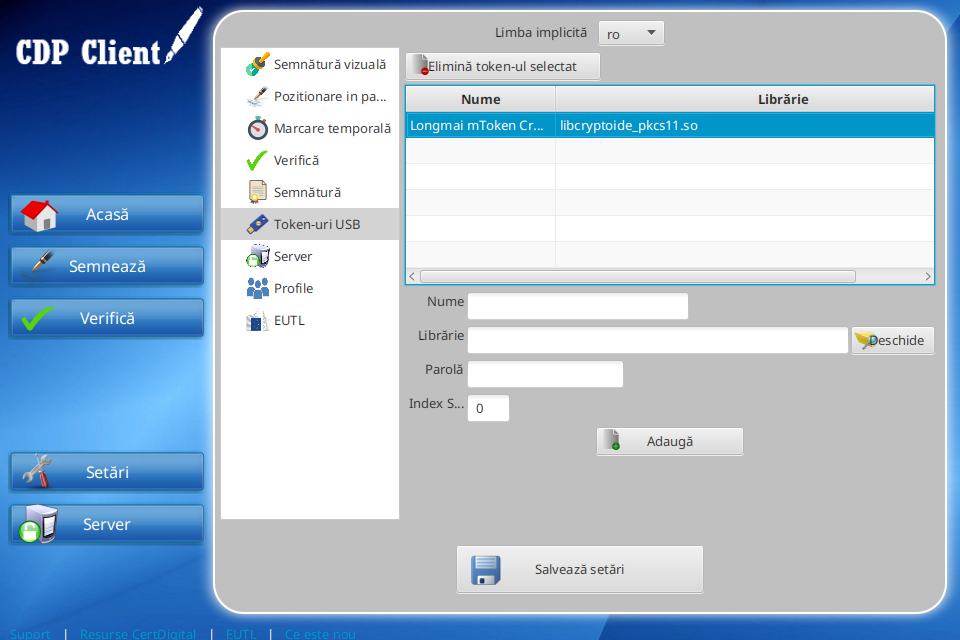
CDP Client Settings

Din Firefox, deschide fereastra Settings din meniul hamburger din dreapta sus.
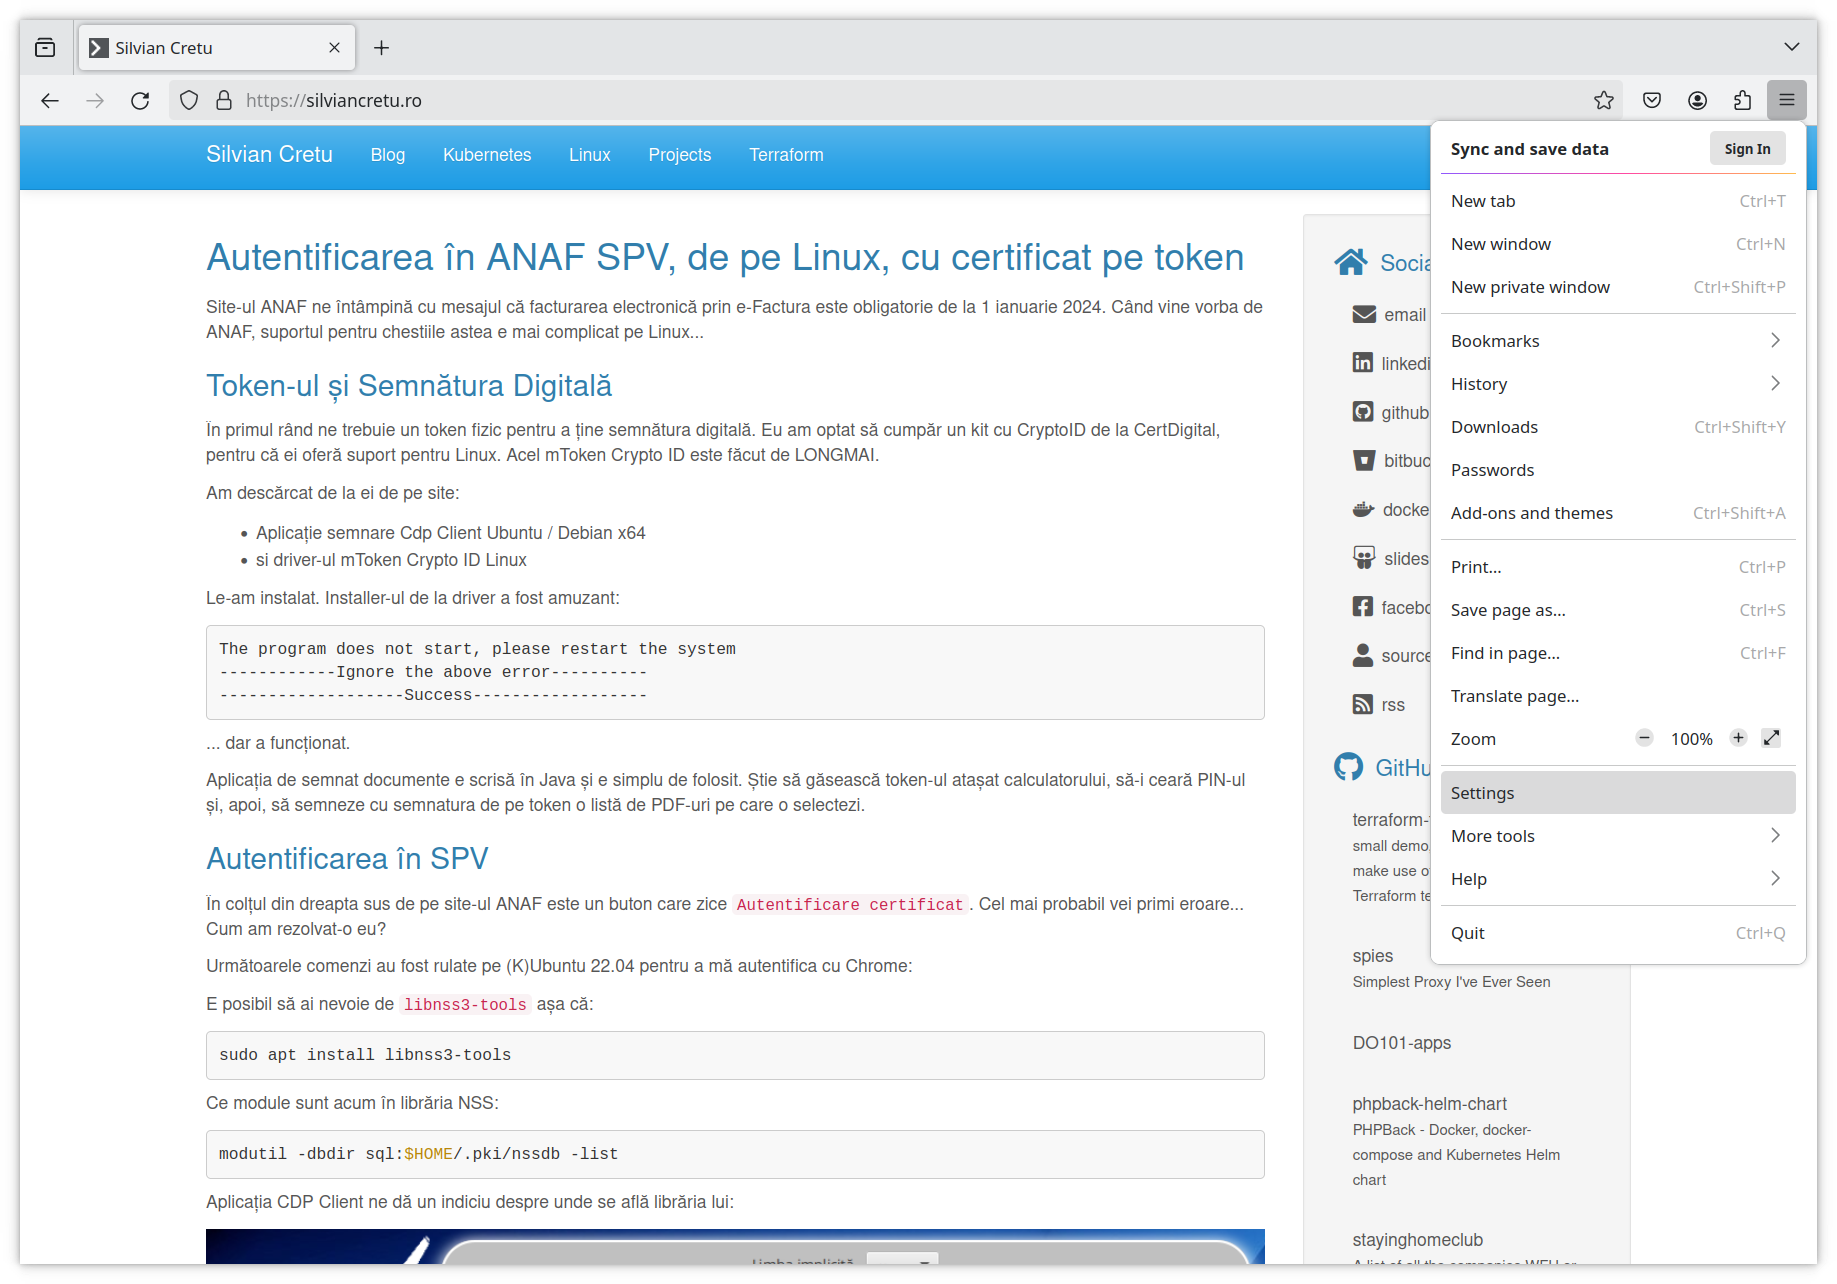
Firefox Hamburger Menu

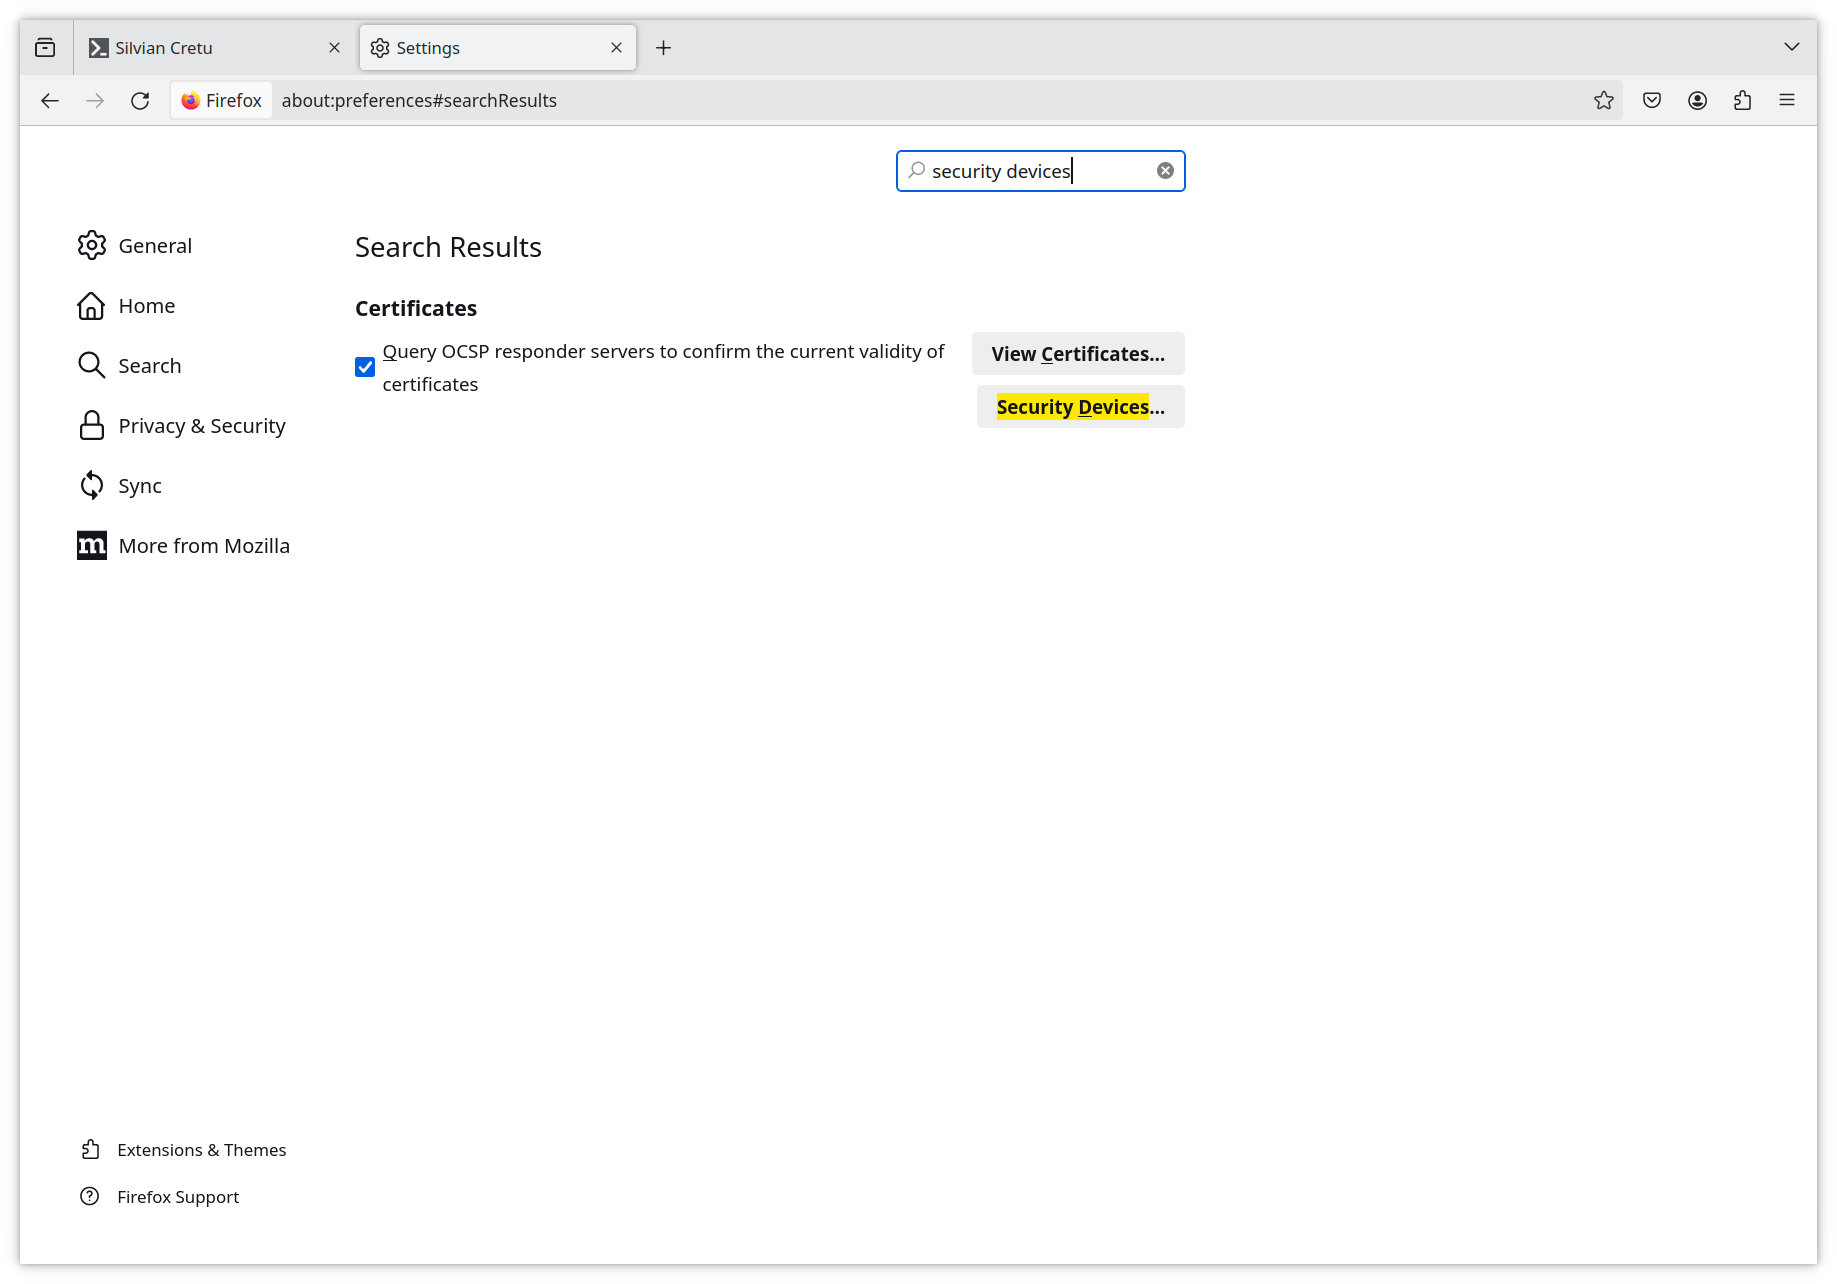
Acolo caută Security Devices.

Firefox Settings

Din fereastra ce se deschide, apasă Load și mergi către directorul personal unde va trebui să intri în directorul ascuns .cdpclient și să selectezi libcryptoide_pkcs11.so. În final ar trebui să arate așa:
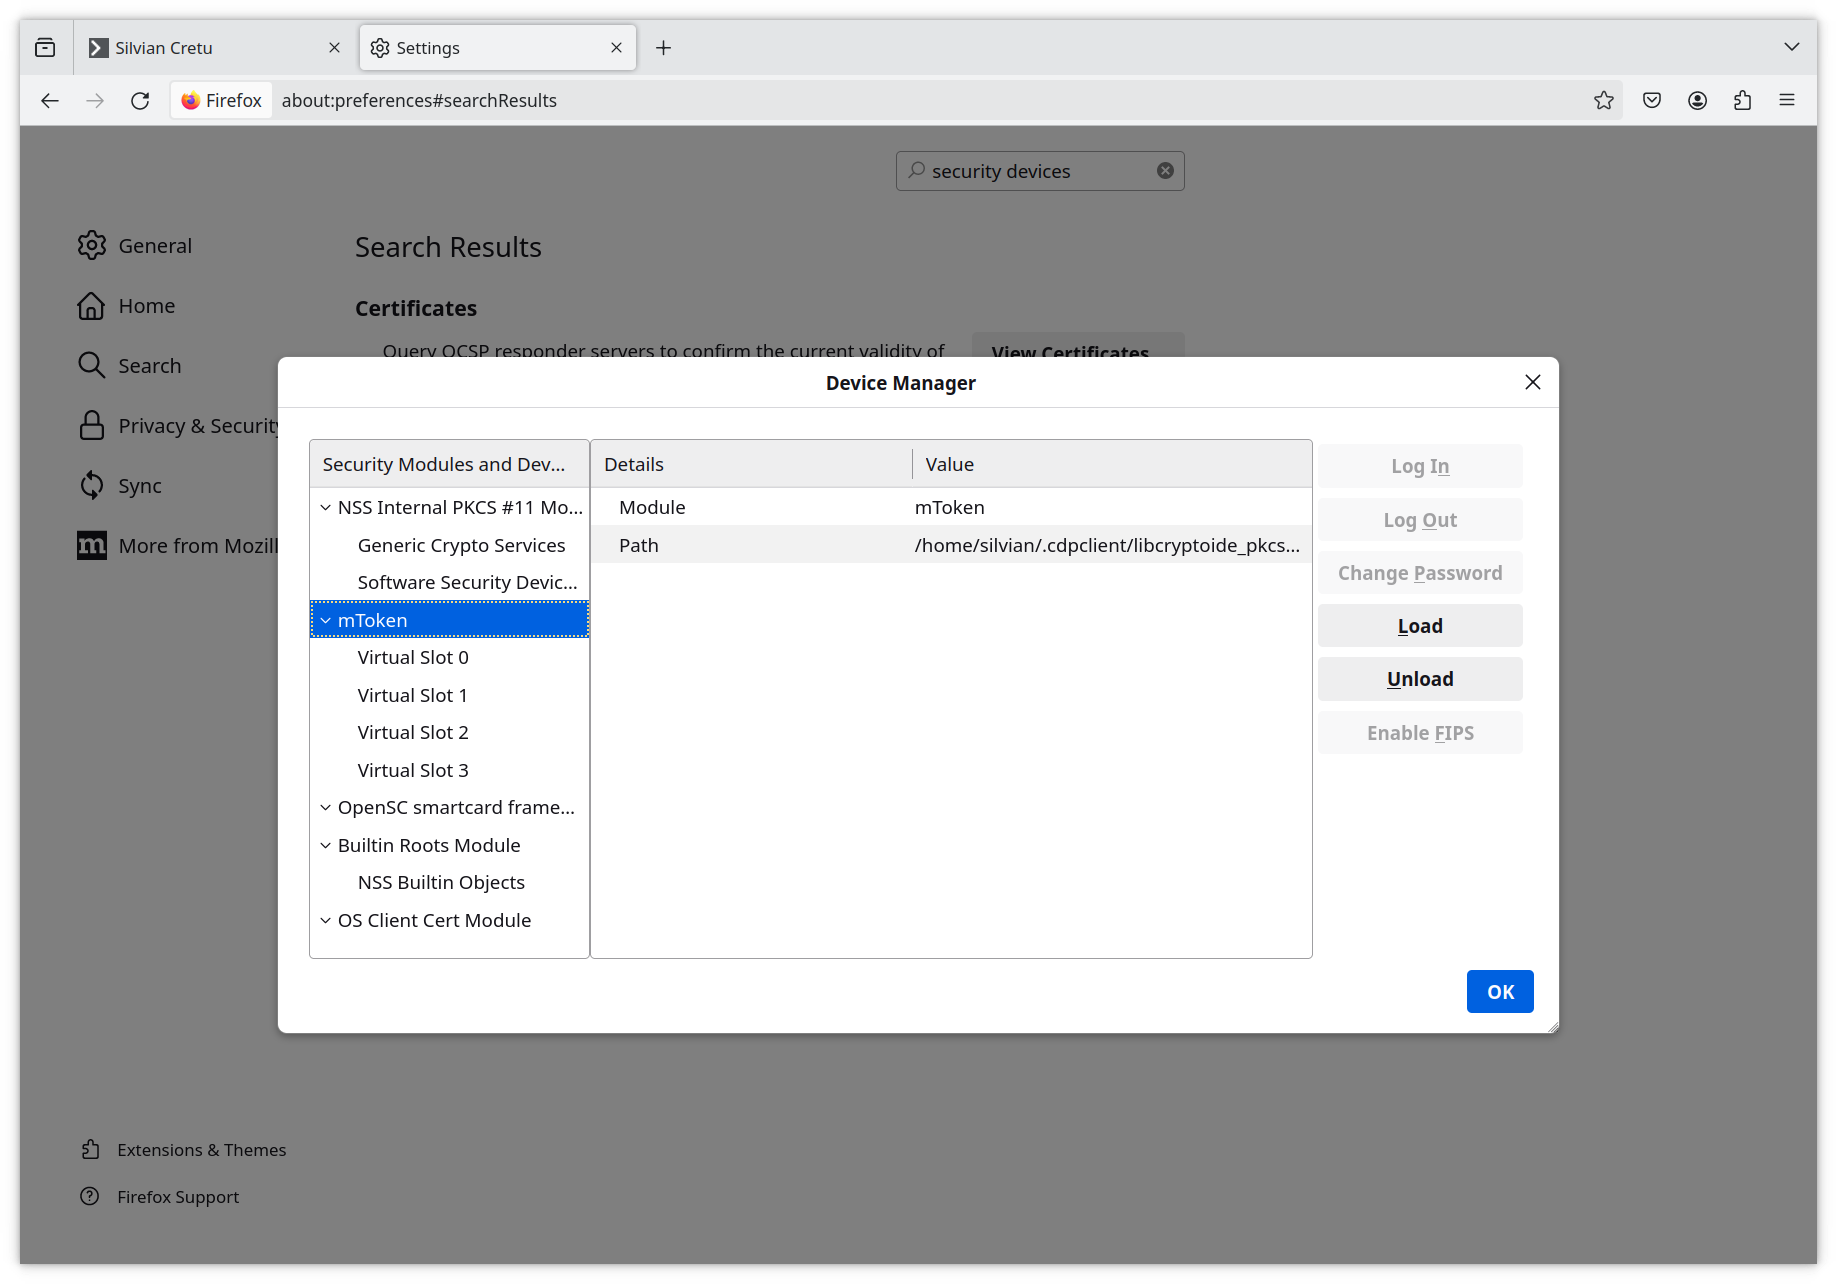
Firefox Security Devices

Salvează și închide. Acum, la apăsarea butonului Autentificare certificat de pe site-ul ANAF, Firefox ar trebui să ceară PIN-ul token-ului și, dacă-l primește pe cel corect, să te ducă în SPV.
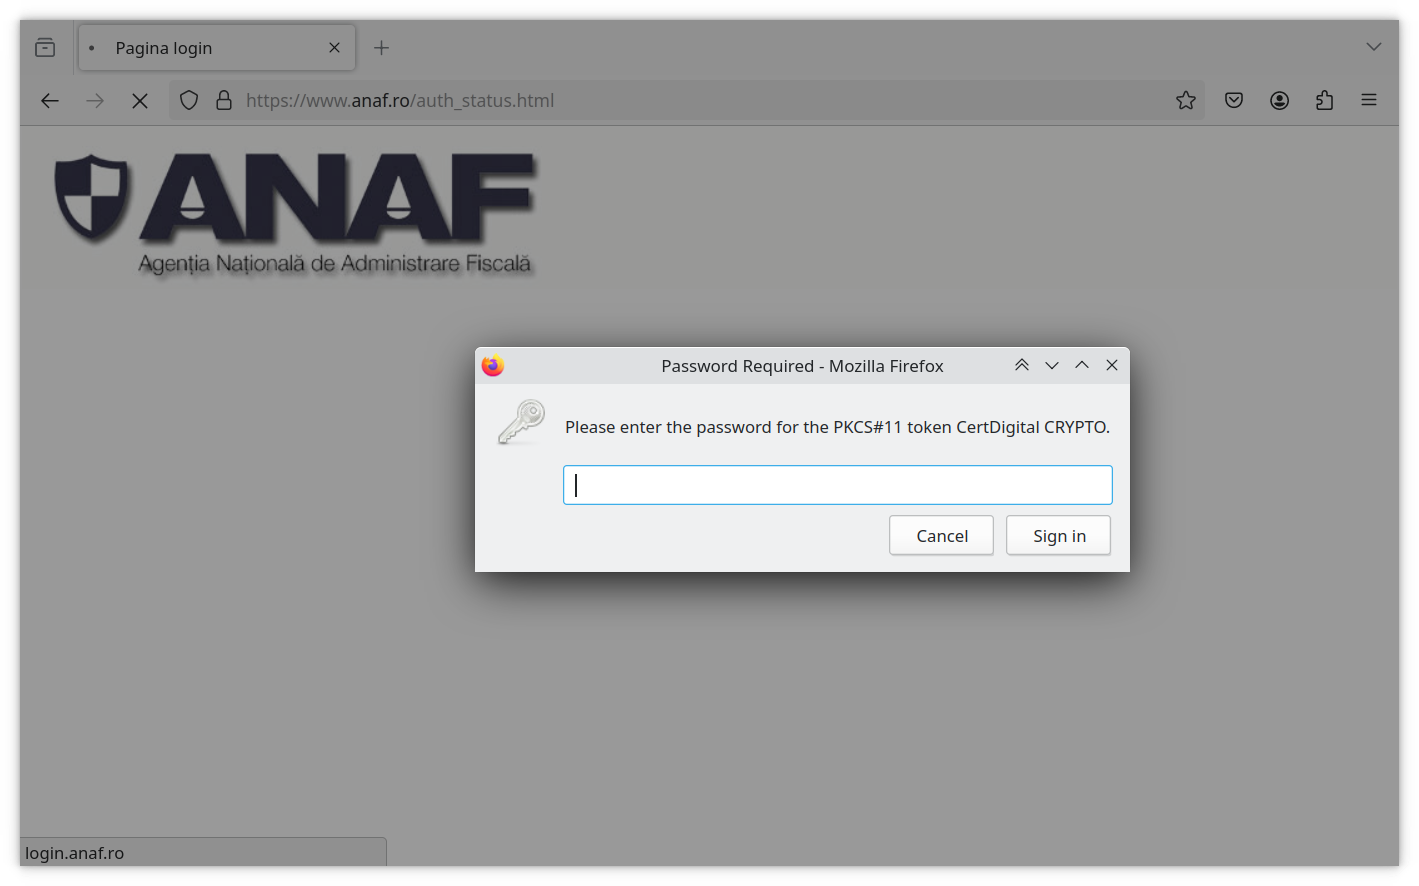
Firefox ANAF

Autentificarea în SPV, pe MacOS, cu Firefox

Pașii de mai jos au fost testați pe un MacBook cu procesor Intel.

Aplicația CDP Client ne dă un indiciu despre unde se află librăria lui:
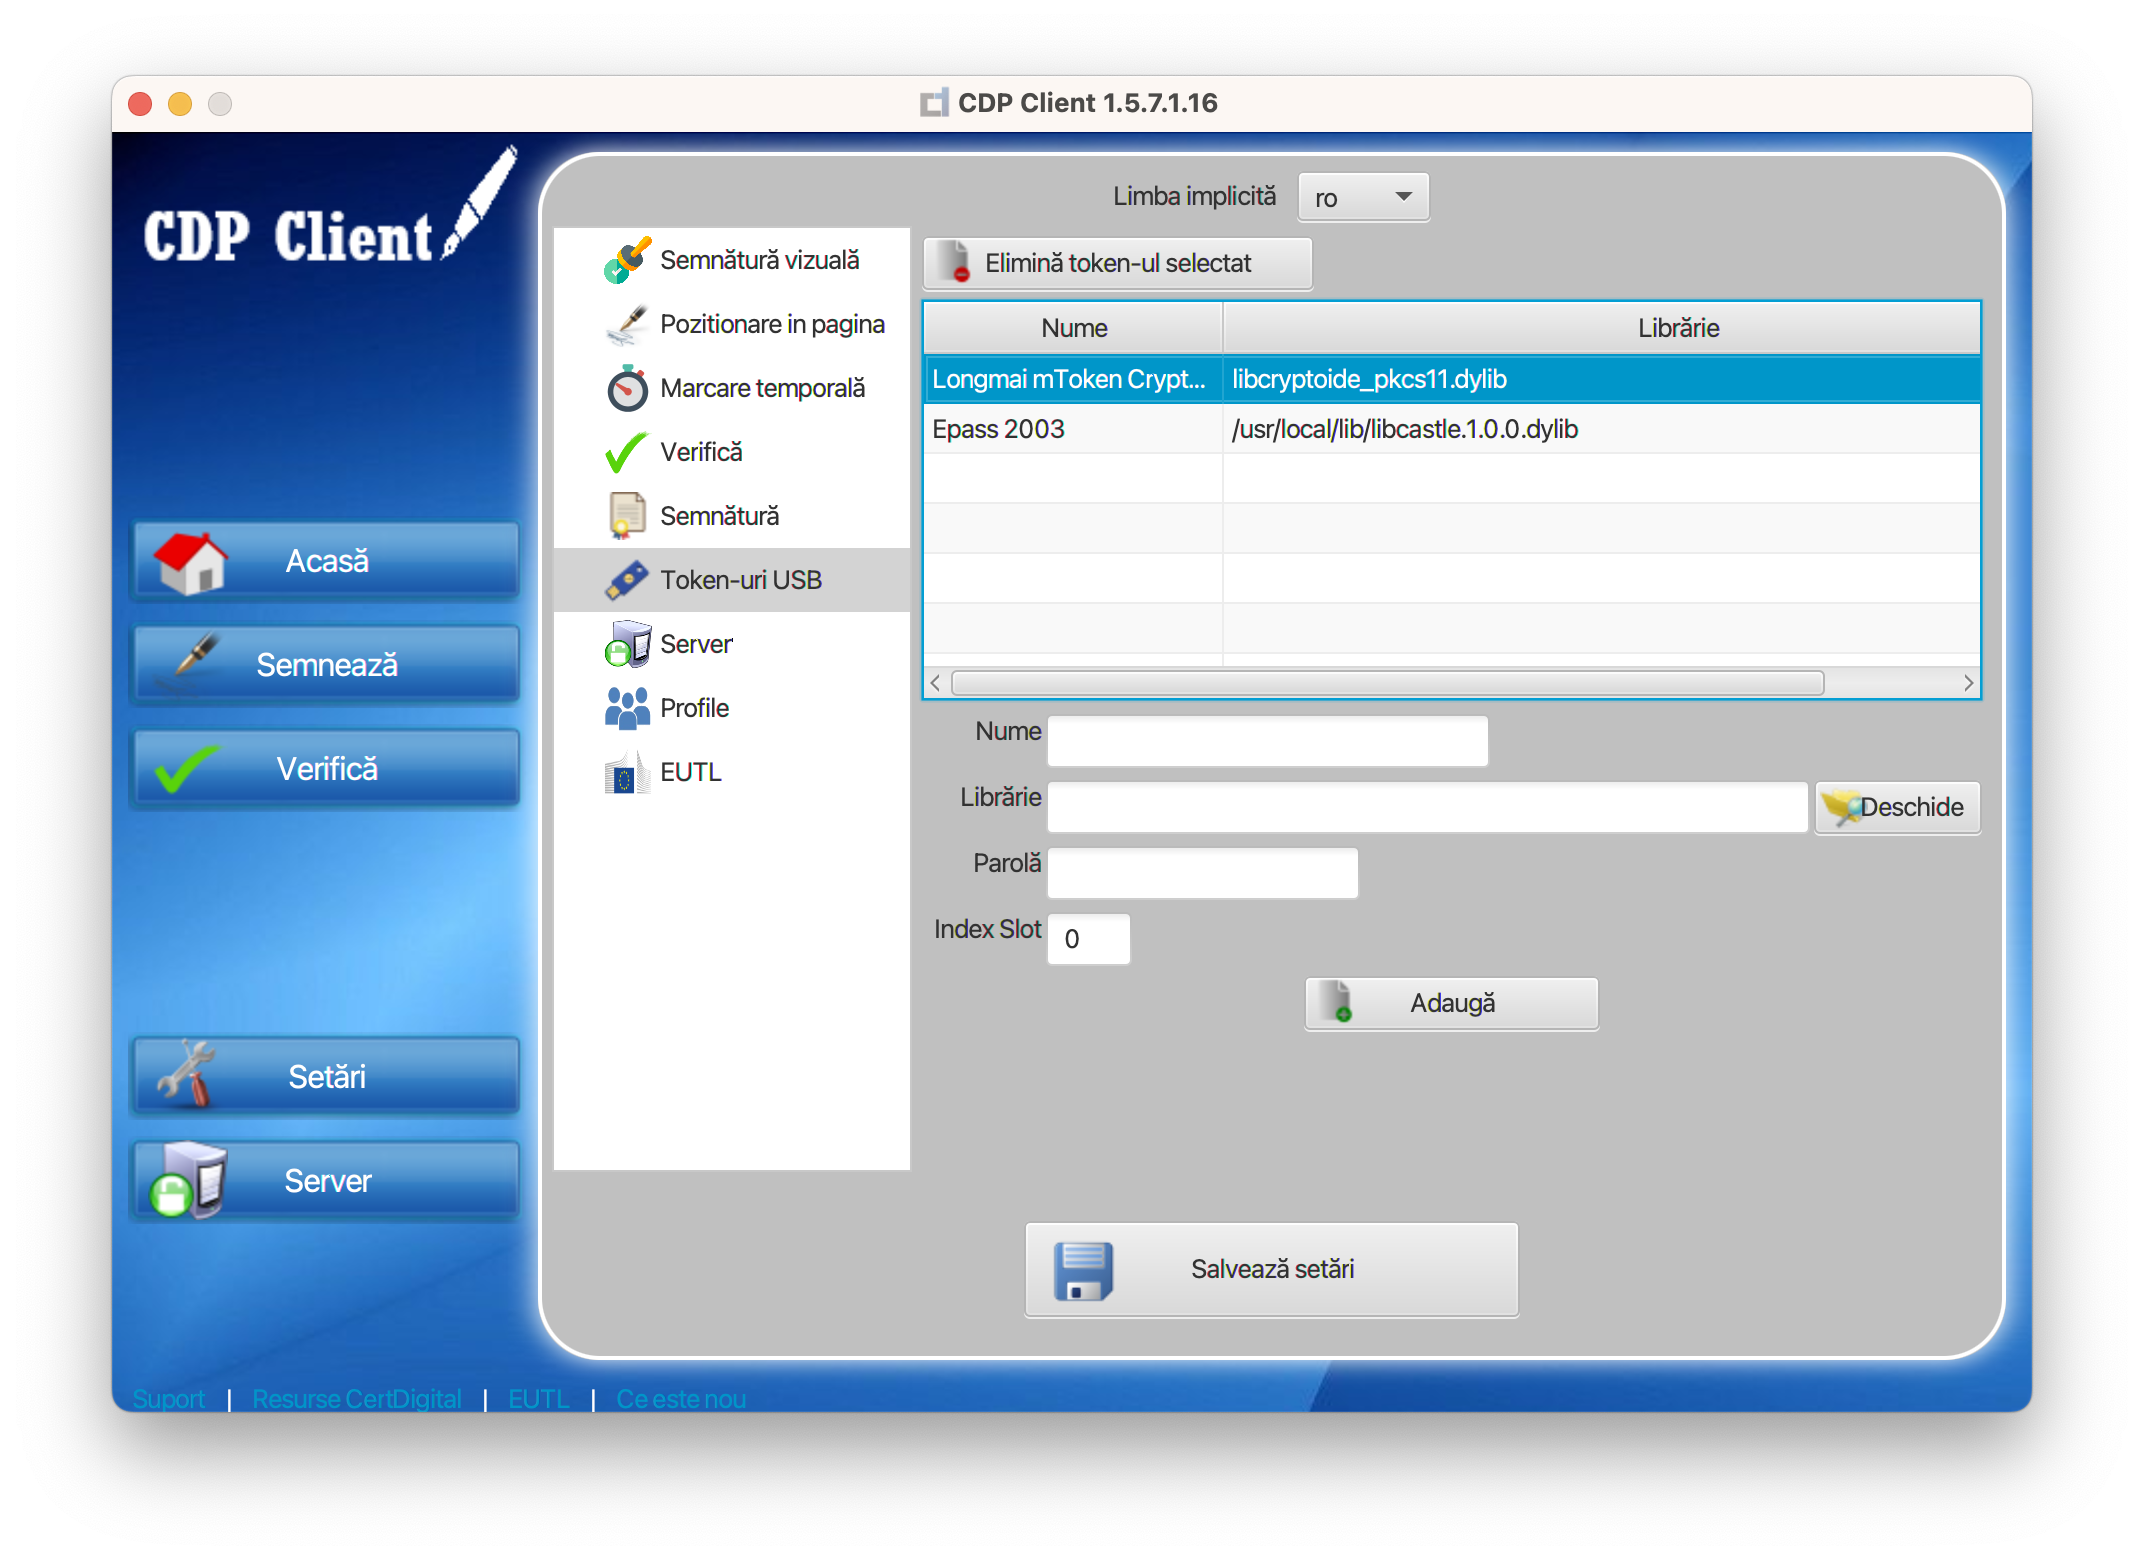
CDP Client Settings

Din Firefox, deschide fereastra Setări/Settings din meniul hamburger din dreapta sus. Acolo caută Dispozitive de securitate / Security Devices.
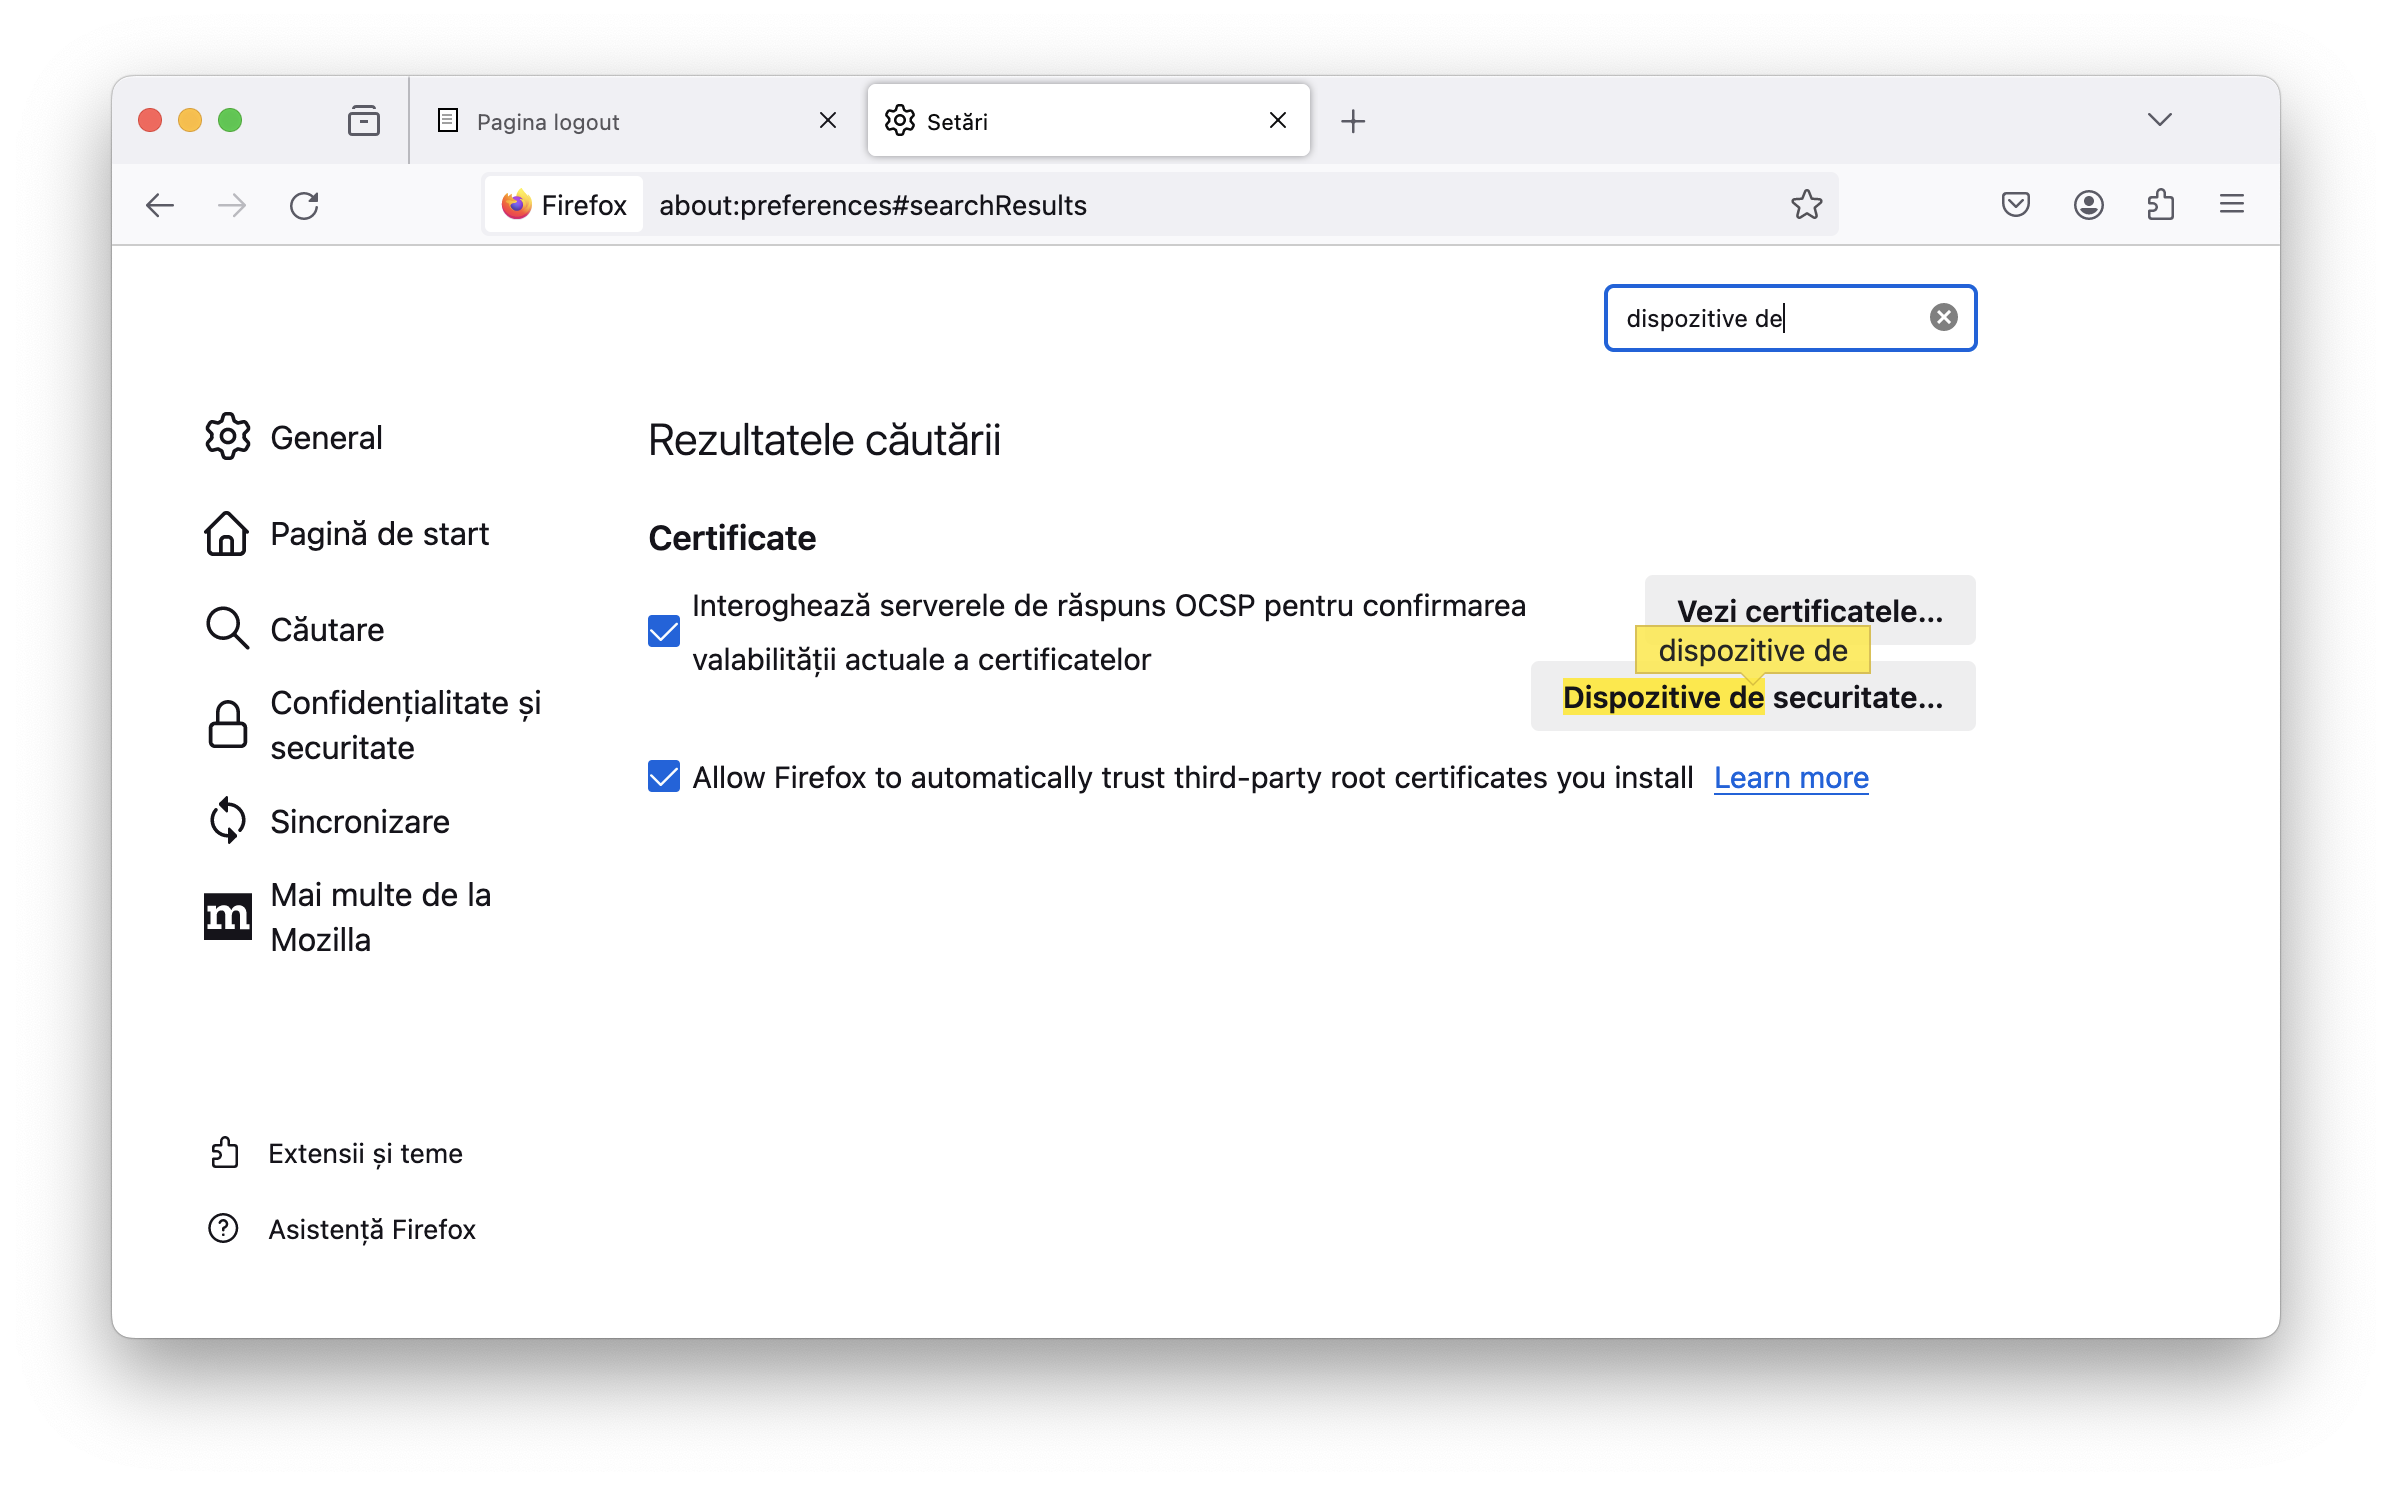
Firefox Settings

Din fereastra ce se deschide, apasă Încarcă / Load și mergi către directorul personal unde va trebui să intri în directorul ascuns .cdpclient (e posibil să trebuiască să apeși Command + Shift + . (punct) pentru a-l vedea) și să selectezi libcryptoide_pkcs11.dylib.
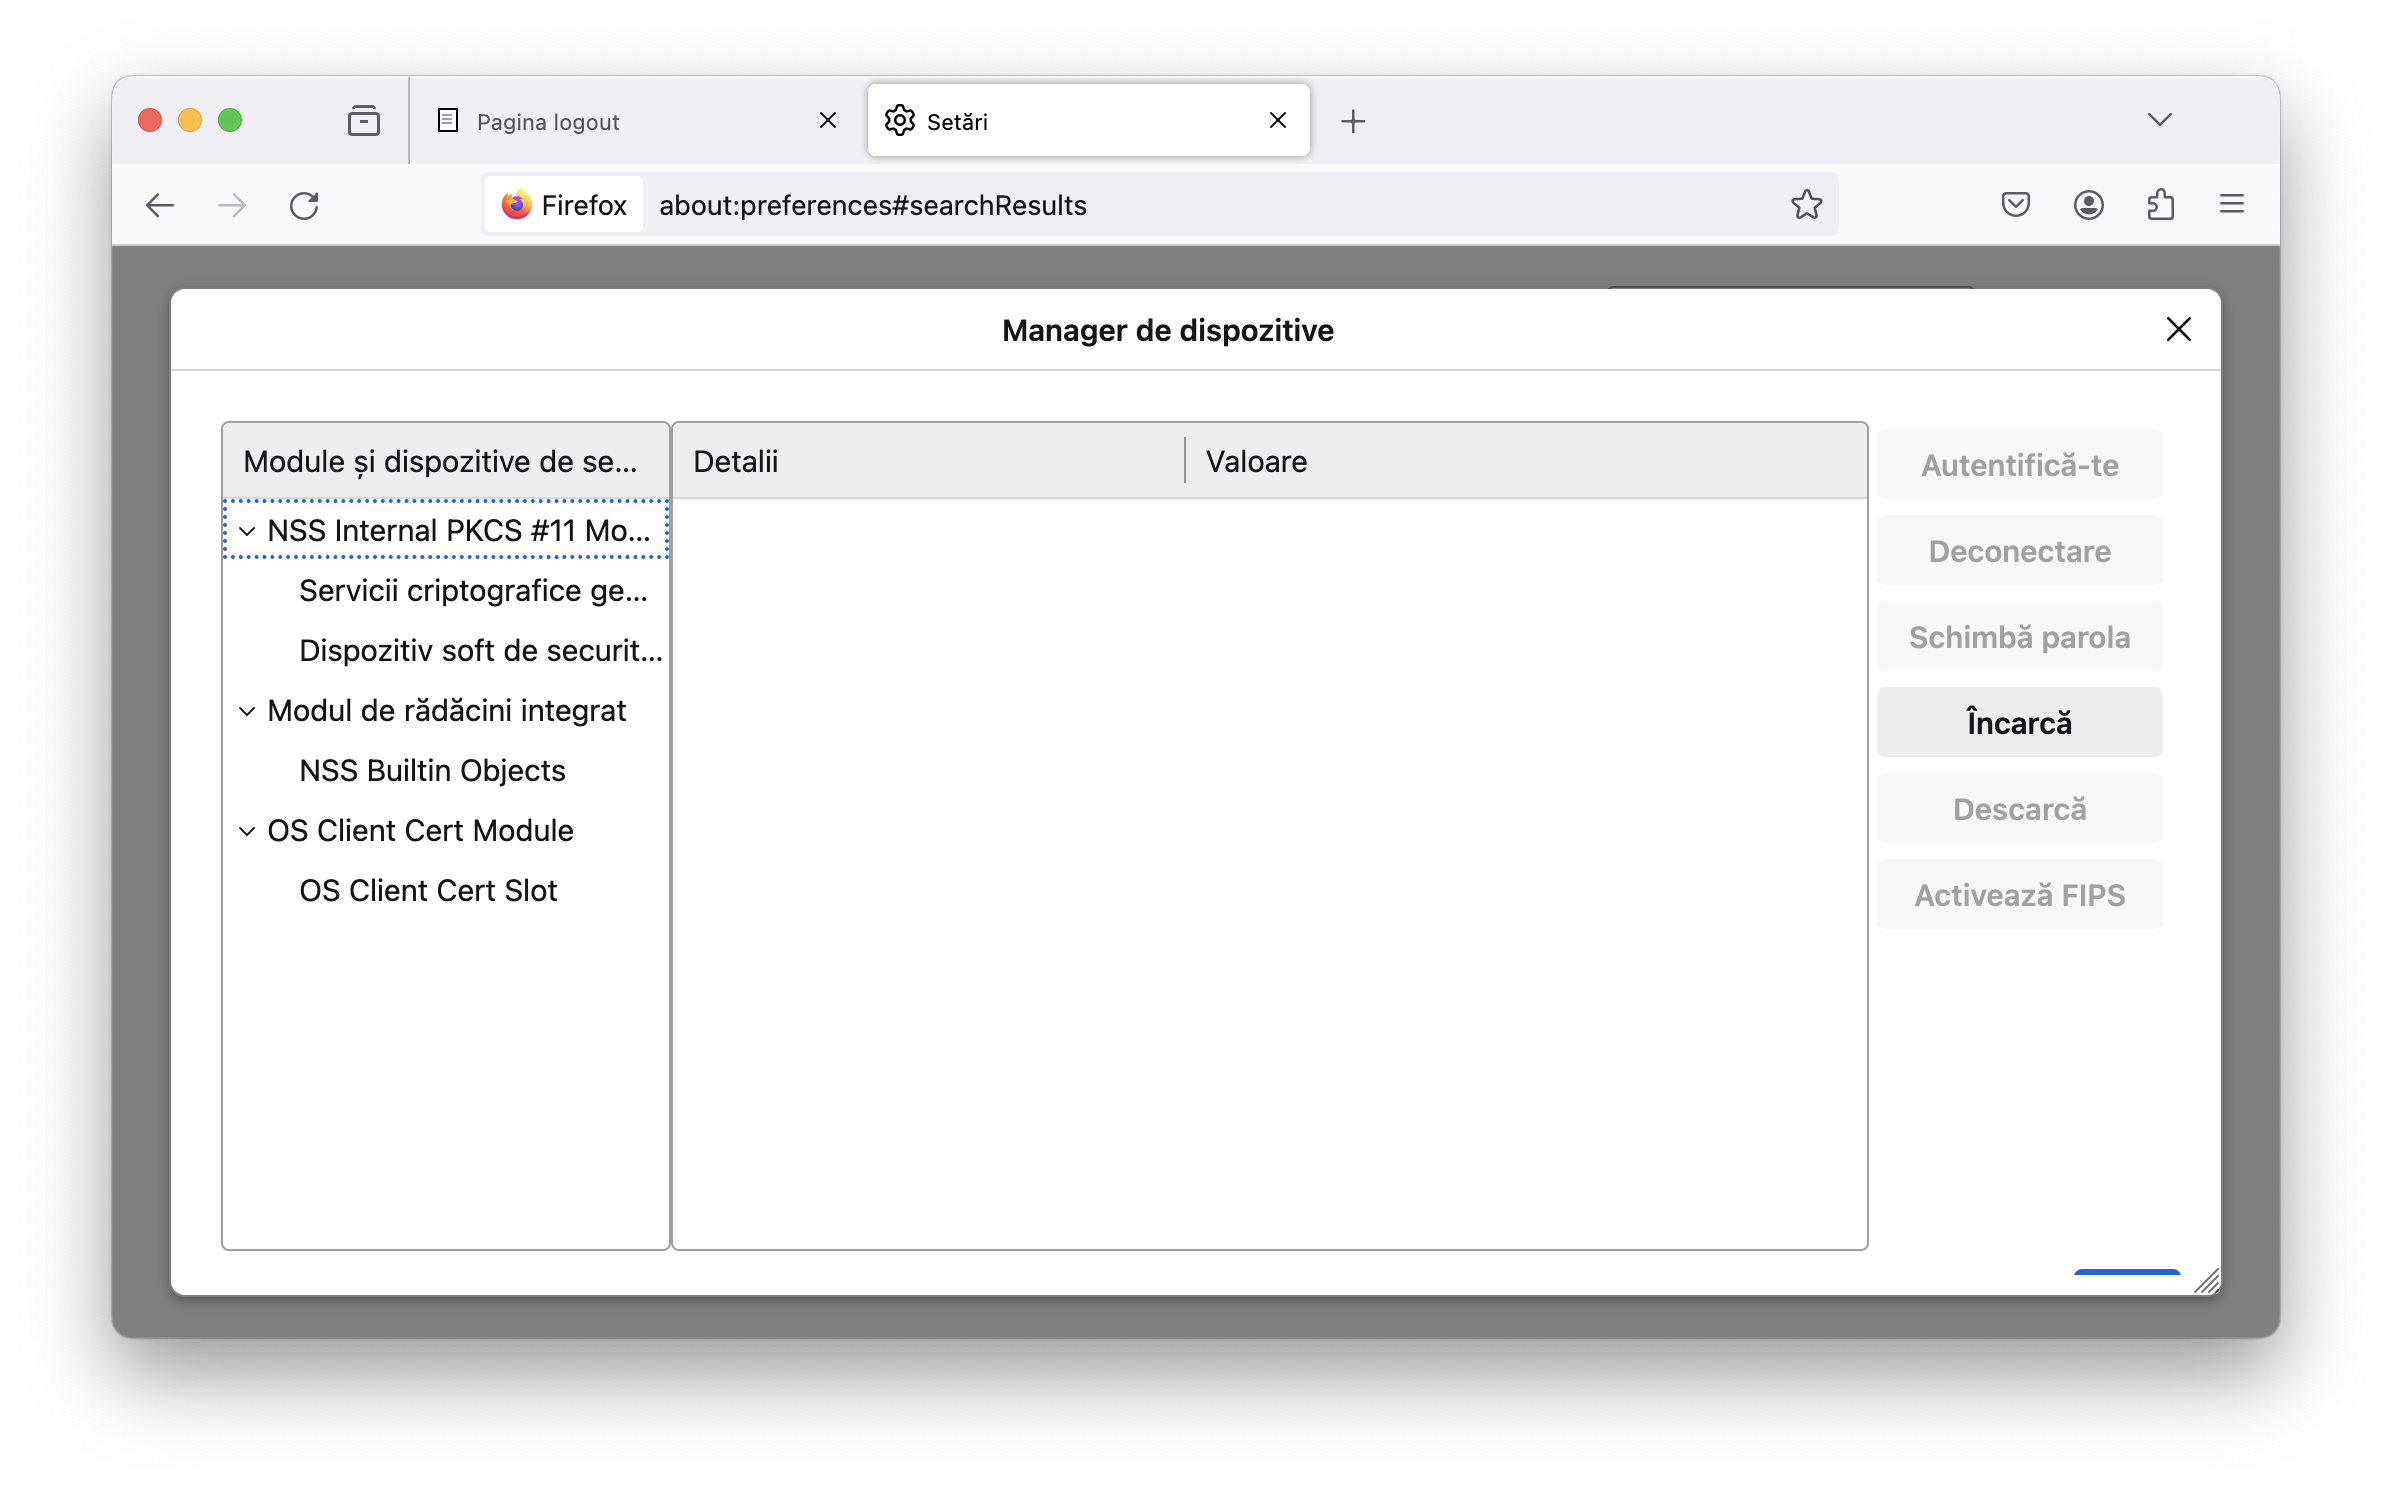
Firefox Security Devices

Salvează și închide. Acum, la apăsarea butonului Autentificare certificat de pe site-ul ANAF, Firefox ar trebui să ceară PIN-ul token-ului și, dacă-l primește pe cel corect, să te ducă în SPV.
more ...

Autentificarea în ANAF SPV, de pe Linux, cu certificat pe token

Site-ul ANAF ne întâmpină cu mesajul că facturarea electronică prin e-Factura este obligatorie de la 1 ianuarie 2024. Când vine vorba de ANAF, suportul pentru chestiile astea e mai complicat pe Linux...

Token-ul și Semnătura Digitală

În primul rând ne trebuie un token fizic pentru a ține semnătura digitală. Eu am optat să cumpăr un kit cu CryptoID de la CertDigital, pentru că ei oferă suport pentru Linux. Acel mToken Crypto ID este făcut de LONGMAI.

Am descărcat de la ei de pe site:

Le-am instalat. Installer-ul de la driver a fost amuzant:

The program does not start, please restart the system
------------Ignore the above error----------
-------------------Success------------------

... dar a funcționat.

Aplicația de semnat documente e scrisă în Java și e simplu de folosit. Știe să găsească token-ul atașat calculatorului, să-i ceară PIN-ul și, apoi, să semneze cu semnatura de pe token o listă de PDF-uri pe care o selectezi.

Autentificarea în SPV, pe Linux, cu Chrome

În colțul din dreapta sus de pe site-ul ANAF este un buton care zice Autentificare certificat. Cel mai probabil vei primi eroare... Cum am rezolvat-o eu?

Următoarele comenzi au fost rulate pe (K)Ubuntu 22.04 pentru a mă autentifica cu Chrome:

E posibil să ai nevoie de libnss3-tools așa că:

sudo apt install libnss3-tools

Ce module sunt acum în librăria NSS:

modutil -dbdir sql:$HOME/.pki/nssdb -list

Aplicația CDP Client ne dă un indiciu despre unde se află librăria lui:

CDP Client Settings

Hai s-o adăugăm în NSS. Chrome ar trebui să fie închis în timpul acestei operațiuni:

modutil -dbdir sql:$HOME/.pki/nssdb -add "mToken" -libfile $HOME/.cdpclient/libcryptoide_pkcs11.so

Acum modulul ar trebui să apară:

modutil -dbdir sql:$HOME/.pki/nssdb -list

După repornirea Chrome și apăsarea butonului Autentificare certificat de pe site-ul ANAF, browser-ul ar trebui să ceară PIN-ul token-ului și, dacă-l primește pe cel corect, să te ducă în SPV.
more ...

Missing Pods in a Kubernetes StatefulSet

I got an alert today about a pod being in CrashLoopBackOff... I went to investigate:

$ kubectl get pods -A
NAMESPACE         NAME                                                           READY   STATUS        RESTARTS         AGE
(truncated output)
default           webserver-0                                                    0/1     Running       2539 (23s ago)   6d13h
default           webserver-2                                                    1/1     Running       0                6d18h
default           webserver-3                                                    1/1     Running       0                6d18h
default           webserver-6                                                    1/1     Running       0                6d18h
default           webserver-7                                                    1/1     Running       0                6d18h
default           webserver-8                                                    1/1     Running       0                6d18h
default           webserver-9                                                    1/1     Running       0                6d18h

Notice the amount of restarts that webserver-0 has. And the fact that webserver-1 is missing...

I initially went the Windows way, trying to restart the statefulset:

$ kubectl rollout restart sts webserver
statefulset.apps/webserver restarted

... but this didn't solve the issue... Actually what's the issue?

Well, describing the pod showed that webserver-0 is trying to pull an older tag of the webserver image, 23.03, which isn't compatible with the version 23.04 which is running on all the other pods and microservices on the cluster... This causes it to fail the liveness probe and stay in this infinite loop:

$ kubectl describe pod webserver-0 | grep -i image
    Image:         artifact.host.fqdn/some/path/webserver:v23.03.26
  Normal   Pulled     25m                   kubelet                                Successfully pulled image "artifact.host.fqdn/some/path/webserver:v23.03.26" in 387.441222ms
  Normal   Pulling    24m (x2 over 25m)     kubelet                                Pulling image "artifact.host.fqdn/some/path/webserver:v23.03.26"
  Normal   Pulled     24m                   kubelet                                Successfully pulled image "artifact.host.fqdn/some/path/webserver:v23.03.26" in 314.222387ms

Interesting enough, all the other pods in the statefulset are running on webserver tag 23.04:

$ kubectl describe pod webserver-8 | grep -i image
    Image:          artifact.host.fqdn/some/path/webserver:v23.04.14

$ kubectl describe pod webserver-1 | grep -i image
Error from server (NotFound): pods "webserver-1" not found

$ kubectl describe pod webserver-9 | grep -i image
    Image:          artifact.host.fqdn/some/path/webserver:v23.04.14

The statefulset is OK with regards to the tag of the webserver image:

$ kubectl get sts webserver -o yaml | grep image
        image: artifact.host.fqdn/some/path/webserver:v23.04.14
        imagePullPolicy: Always

Let's look at the revision history:

$ kubectl rollout history sts webserver --revision 9 | grep -i image
    Image:      artifact.host.fqdn/some/path/webserver:v23.03.26

$ kubectl rollout history sts webserver --revision 10 | grep -i image
    Image:      artifact.host.fqdn/some/path/webserver:v23.04.14

$ kubectl rollout history sts webserver --revision 11 | grep -i image
    Image:      artifact.host.fqdn/some/path/webserver:v23.04.14

$ kubectl rollout undo sts webserver --to-revision 11
statefulset.apps/webserver skipped rollback (current template already matches revision 11)

Revision 10 was created by a helm upgrade command and 11 by my rolling restart...

Searching the internet got me to this interesting answer that says: The more likely event here seems like one of your node deletions took down pod-1 and pod-2 after pod-0 went unhealthy. In that case, we do not attempt to recreate pod-1 or 2 till pod-0 becomes healthy again. The rationale for …

more ...

Terraform Template Gimmicks

While managing multiple environments with Terraform, you might come across this scenario:

  • you have to manage multiple environments
  • all the environments use the same configuration file, but with different values
  • so, the above mentioned configuration file has to be a template
  • some environments tend to be snowflakes, as they have non-default values

You want to accomplish two things:

  • limit the number of variables you maintain for each environment
  • not replicate a snowflake variable to a standard / non-snowflake environment

The solution

The TL;DR version

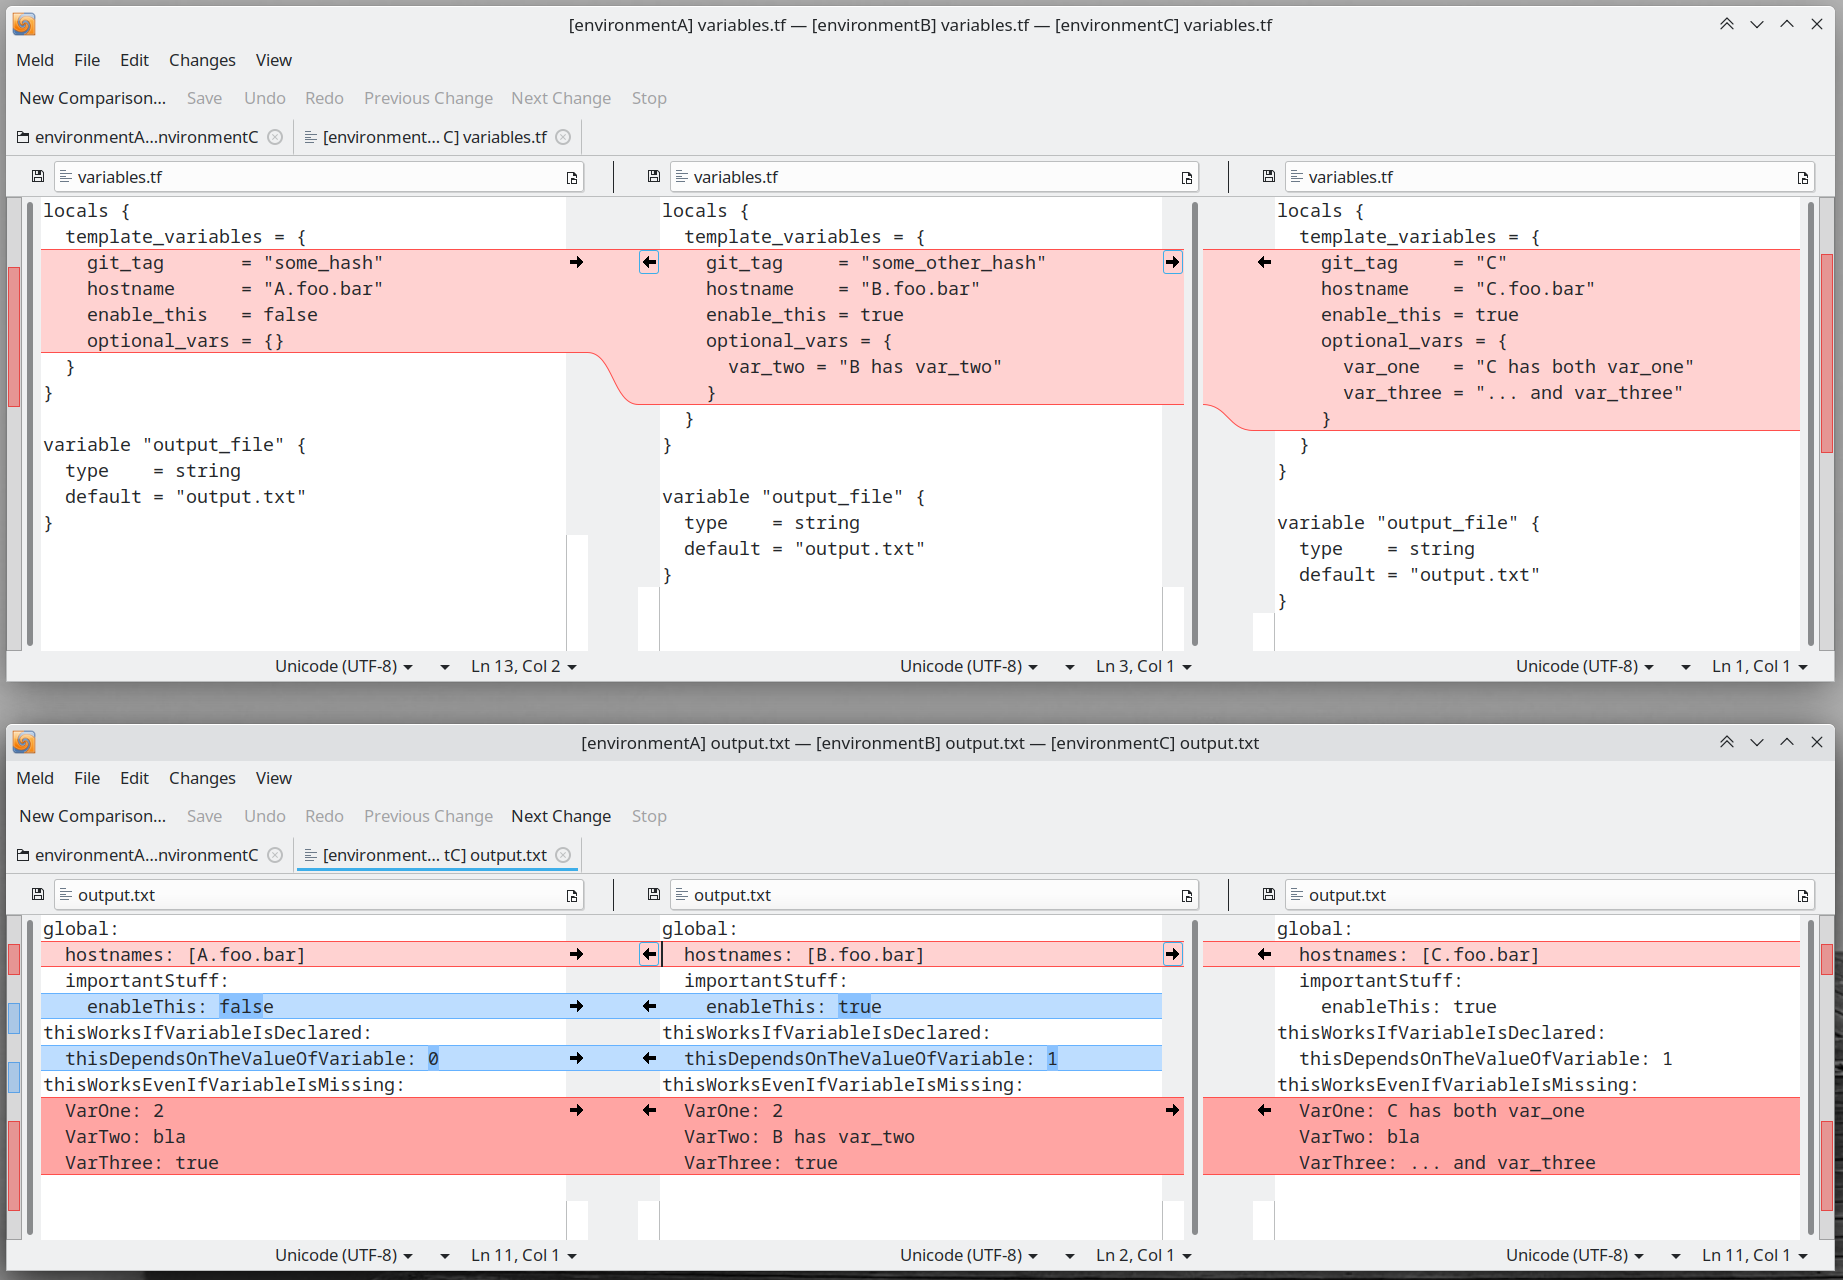
variables and outputs

The structure of the Terraform code

$ tree 
.
├── common-template-file.tftpl
├── environmentA
│   ├── render-template.tf
│   └── variables.tf
├── environmentB
│   ├── render-template.tf
│   └── variables.tf
├── environmentC
│   ├── render-template.tf
│   └── variables.tf
├── environmentD
│   ├── render-template.tf
│   └── variables.tf
├── environmentE
│   ├── render-template.tf
│   └── variables.tf
└── README.md

So

  • there's a common template for all environments
  • each environment has its own directory
  • each environment has a bunch of .tf files holding the Terraform code
  • in variables.tf each environment has its own custom set of variables

The template and the variables

This is the common template file:

global:
  hostnames: [${hostname}]
  importantStuff:
    enableThis: ${enable_this}
thisWorksIfVariableIsDeclared:
  thisDependsOnTheValueOfVariable: %{ if enable_this == false }0%{ else }1%{ endif }
thisWorksEvenIfVariableIsMissing:
  VarOne: ${try(optional_vars.var_one, 2)}
  VarTwo: ${try(optional_vars.var_two, "bla")}
  VarThree: ${try(optional_vars.var_three, true)}

The are two important sections in the template:

the first one:

  thisDependsOnTheValueOfVariable: %{ if enable_this == false }0%{ else }1%{ endif }
  • enable_this is a variable that must exist in all variables.tf files
  • environmentE doesn't have it and you'll see Terraform failing because of that
  • depending on its value, another variable is set.

the second one:

thisWorksEvenIfVariableIsMissing:
  VarOne: ${try(optional_vars.var_one, 2)}
  VarTwo: ${try(optional_vars.var_two, "bla")}
  VarThree: ${try(optional_vars.var_three, true)}
  • optional_vars is a section (that can have any other name) that must exist in all variables.tf files
  • environmentD doesn't have it and you'll see Terraform failing because of that
  • but any variable nested under optional_vars is optional and can be missing

So, this will work in variables.tf:

template_variables = {
  git_tag       = "some_hash"
  hostname      = "A.foo.bar"
  enable_this   = false
  optional_vars = {}
}

and this will work as well:

template_variables = {
  git_tag     = "C"
  hostname    = "C.foo.bar"
  enable_this = true
  optional_vars = {
    var_one   = "C has both var_one"
    var_three = "... and var_three"
  }
}

but this won't:

template_variables = {
  git_tag     = "some_hash"
  hostname    = "D.foo.bar"
  enable_this = false
}
more ...

Kafka, Kubernetes and Not enough space

So I came across a situation and it took me a while to figure it out. So I'm putting this together as it might help others as well.

Let's say you have Bitnami's packaged Kafka cluster running on Kubernetes on StatefulSets, (so not managed by an operator like Strimzi). And the pods start restarting...

Looking at the logs you might see stuff like this:

-9ee616bdcf73, partition=0, highWatermark=0, lastStableOffset=0, logStartOffset=0, logEndOffset=0) with 1 segments in 2ms (32564/32564 loaded in /bitnami/kafka/data) (kafka.log.LogManager)
[2022-07-06 20:46:05,895] INFO Loaded 32564 logs in 161618ms. (kafka.log.LogManager)
[2022-07-06 20:46:05,896] INFO Starting log cleanup with a period of 300000 ms. (kafka.log.LogManager)
[2022-07-06 20:46:05,896] INFO Starting log flusher with a default period of 9223372036854775807 ms. (kafka.log.LogManager)
[2022-07-06 20:46:05,908] INFO Starting the log cleaner (kafka.log.LogCleaner)
[2022-07-06 20:46:05,999] INFO [kafka-log-cleaner-thread-0]: Starting (kafka.log.LogCleaner)
[2022-07-06 20:46:06,296] INFO [BrokerToControllerChannelManager broker=0 name=forwarding]: Starting (kafka.server.BrokerToControllerRequestThread)
[2022-07-06 20:46:06,419] INFO Updated connection-accept-rate max connection creation rate to 2147483647 (kafka.network.ConnectionQuotas)
[2022-07-06 20:46:06,428] INFO Awaiting socket connections on 0.0.0.0:9093. (kafka.network.Acceptor)
[2022-07-06 20:46:06,463] INFO [SocketServer listenerType=ZK_BROKER, nodeId=0] Created data-plane acceptor and processors for endpoint : ListenerName(INTERNAL) (kafka.network.SocketServer)
[2022-07-06 20:46:06,464] INFO Updated connection-accept-rate max connection creation rate to 2147483647 (kafka.network.ConnectionQuotas)
[2022-07-06 20:46:06,464] INFO Awaiting socket connections on 0.0.0.0:9092. (kafka.network.Acceptor)
[2022-07-06 20:46:06,473] INFO [SocketServer listenerType=ZK_BROKER, nodeId=0] Created data-plane acceptor and processors for endpoint : ListenerName(CLIENT) (kafka.network.SocketServer)
[2022-07-06 20:46:06,481] INFO [BrokerToControllerChannelManager broker=0 name=alterIsr]: Starting (kafka.server.BrokerToControllerRequestThread)
[2022-07-06 20:46:06,508] INFO [ExpirationReaper-0-Produce]: Starting (kafka.server.DelayedOperationPurgatory$ExpiredOperationReaper)
[2022-07-06 20:46:06,509] INFO [ExpirationReaper-0-Fetch]: Starting (kafka.server.DelayedOperationPurgatory$ExpiredOperationReaper)
[2022-07-06 20:46:06,511] INFO [ExpirationReaper-0-DeleteRecords]: Starting (kafka.server.DelayedOperationPurgatory$ExpiredOperationReaper)
[2022-07-06 20:46:06,512] INFO [ExpirationReaper-0-ElectLeader]: Starting (kafka.server.DelayedOperationPurgatory$ExpiredOperationReaper)
[2022-07-06 20:46:06,529] INFO [LogDirFailureHandler]: Starting (kafka.server.ReplicaManager$LogDirFailureHandler)
[2022-07-06 20:46:06,611] INFO Creating /brokers/ids/0 (is it secure? false) (kafka.zk.KafkaZkClient)
[2022-07-06 20:46:06,642] INFO Stat of the created znode at /brokers/ids/0 is: 511242113,511242113,1657140366624,1657140366624,1,0,0,72062637399277581,364,0,511242113
 (kafka.zk.KafkaZkClient)
[2022-07-06 20:46:06,643] INFO Registered broker 0 at path /brokers/ids/0 with addresses: INTERNAL://kafka-0.kafka-headless.default.svc.cluster.local:9093,CLIENT://kafka-0.kafka-headless.default.svc.cluster.local:9092, czxid (broker epoch): 511242113 (kafka.zk.KafkaZkClient)
[2022-07-06 20:46:06,758] INFO [ControllerEventThread controllerId=0] Starting (kafka.controller.ControllerEventManager$ControllerEventThread)
[2022-07-06 20:46:06,765] INFO …
more ...

(K)Ubuntu 22.04 and Bluetooth Headphones

This article is somewhat an update of the one named Linux and Bluetooth Headphones. In that article I had tested on (K)Ubuntu 20.04, but this article is about version 22.04.

Just like in the above mentioned article, I recommend that you install and enable PipeWire. It is a lot easier to do in (K)Ubuntu 22.04. The TL;DR version would be:

First, check to see which audio server you're currently on. This command most probably will return 'pulseaudio':

$ pactl info | grep 'Server Name'
Server Name: pulseaudio

So... make sure you install PipeWire:

$ sudo apt update
$ sudo apt install pipewire
$ sudo apt install gstreamer1.0-pipewire libpipewire-0.3-{0,dev,modules} libspa-0.2-{bluetooth,dev,jack,modules} pipewire{,-{audio-client-libraries,pulse,bin,tests}}
$ sudo apt install wireplumber gir1.2-wp-0.4 libwireplumber-0.4-{0,dev}

Disable PulseAudio and enable PipeWire instead:

$ systemctl --user --now disable pulseaudio.{socket,service}
$ systemctl --user mask pulseaudio

$ sudo cp -vRa /usr/share/pipewire /etc/

$ systemctl --user --now enable pipewire{,-pulse}.{socket,service}

Now, you should see PipeWire in here:

$ pactl info | grep 'Server Name'
Server Name: PulseAudio (on PipeWire 0.3.48)

For even more details, read this excellent article.

I tested with EDIFIER NeoBuds Pro and not only that switching between A2DP and HSP/HFP works automagically but, more than that, LDAC codec also works (which previously only worked for SONY WH-1000XM3):

$ pactl list
(output omitted)
Card #5323
        Name: bluez_card.FC_E8_06_76_05_2C
        Driver: module-bluez5-device.c
        Owner Module: n/a
        Properties:
                api.bluez5.address = "FC:E8:06:76:05:2C"
                api.bluez5.class = "0x240404"
                api.bluez5.connection = "disconnected"
                api.bluez5.device = ""
                api.bluez5.icon = "audio-headset"
                api.bluez5.path = "/org/bluez/hci0/dev_FC_E8_06_76_05_2C"
                bluez5.auto-connect = "[ hfp_hf hsp_hs a2dp_sink ]"
                bluez5.profile = "off"
                device.alias = "EDIFIER NeoBuds Pro"
                device.api = "bluez5"
                device.bus = "bluetooth"
                device.description = "EDIFIER NeoBuds Pro"
                device.form_factor = "headset"
                device.name = "bluez_card.FC_E8_06_76_05_2C"
                device.string = "FC:E8:06:76:05:2C"
                media.class = "Audio/Device"
                factory.id = "14"
                client.id = "34"
                object.id = "132"
                object.serial = "5323"
        Profiles:
                off: Off (sinks: 0, sources: 0, priority: 0, available: yes)
                a2dp-sink: High Fidelity Playback (A2DP Sink) (sinks: 1, sources: 0, priority: 16, available: yes)
                headset-head-unit: Headset Head Unit (HSP/HFP) (sinks: 1, sources: 1, priority: 1, available: yes)
                a2dp-sink-sbc: High Fidelity Playback (A2DP Sink, codec SBC) (sinks: 1, sources: 0, priority: 18, available: yes)
                a2dp-sink-sbc_xq: High Fidelity Playback (A2DP Sink, codec SBC-XQ) (sinks: 1, sources: 0, priority: 17, available: yes)
                a2dp-sink-ldac: High Fidelity Playback (A2DP Sink, codec LDAC) (sinks: 1, sources: 0, priority: 19, available: yes)
                headset-head-unit-cvsd: Headset Head Unit (HSP/HFP, codec CVSD) (sinks: 1, sources: 1, priority: 2, available: yes)
                headset-head-unit-msbc: Headset Head Unit (HSP/HFP, codec mSBC) (sinks: 1, sources: 1, priority: 3, available: yes)
        Active Profile: a2dp-sink-ldac
        Ports:
                headset-input: Headset (type: Headset, priority: 0, latency offset: 0 usec, available)
                        Properties:
                                port.type = "headset"
                        Part of profile(s): headset-head-unit, headset-head-unit-cvsd, headset-head-unit-msbc
                headset-output: Headset (type: Headset, priority: 0, latency offset: 0 usec, available)
                        Properties:
                                port.type = "headset"
                        Part of profile(s): a2dp-sink, headset-head-unit, a2dp-sink-sbc, a2dp-sink-sbc_xq …
more ...

Linux and Bluetooth Headphones

For newer versions of Linux, like (K)Ubuntu 22.04 (which have PipeWire already installed or even enabled by default), please go directly to (K)Ubuntu 22.04 and Bluetooth Headphones

Connecting a set of bluetooth headphones to your Linux computer is a simple thing, if you just want to listen to music. But what about when you want to use the microphone that is, most probably, embedded in those headphones?

How I tested?

All the below information was tested on Kubuntu 20.04 with the following headphones:

How to check if your microphone is working or not?

You can test from an application that makes use of the microphone like Skype or 8x8 Meet.

For example, in this screenshot, it doesn't work. Just go to https://8x8.vc/someRandomString and click the up arrow next to the microphone symbol to see the list of available microphones your computer has. You might see the headphones (in this particular example, the EDIFIER NeoBuds Pro are conected) but only the laptop's internal microphone is detected.

the mic doesn't show up

From the command line, you can run this command:

$ pactl list

At the end of the output, you should see something like this:

Card #31
  Name: bluez_card.FC_E8_06_76_05_2C
  Driver: module-bluez5-device.c
  Owner Module: 56
  Properties:
    device.description = "EDIFIER NeoBuds Pro"
    device.string = "FC:E8:06:76:05:2C"
    device.api = "bluez"
    device.class = "sound"
    device.bus = "bluetooth"
    device.form_factor = "headset"
    bluez.path = "/org/bluez/hci0/dev_FC_E8_06_76_05_2C"
    bluez.class = "0x240404"
    bluez.alias = "EDIFIER NeoBuds Pro"
    device.icon_name = "audio-headset-bluetooth"
    device.intended_roles = "phone"
  Profiles:
    a2dp_sink: High Fidelity Playback (A2DP Sink) (sinks: 1, sources: 0, priority: 40, available: yes)
    headset_head_unit: Headset Head Unit (HSP/HFP) (sinks: 1, sources: 1, priority: 30, available: no)
    off: Off (sinks: 0, sources: 0, priority: 0, available: yes)
  Active Profile: a2dp_sink
  Ports:
    headset-output: Headset (priority: 0, latency offset: 0 usec, available)
      Part of profile(s): a2dp_sink, headset_head_unit
    headset-input: Headset (priority: 0, latency offset: 0 usec, not available)
      Part of profile(s): headset_head_unit

Notice the Profiles section and the fact that the profile headset_head_unit is not available and, also, that the Active Profile is set to a2dp_sink.

The easy way: making HSP work

This only works for JBL TUNE205BT.

This is easy, as it doesn't require any hacks or additional software. Just edit the file /etc/pulse/default.pa and add auto_switch=2 to the line load-module module-bluetooth-discover. In the end, the file should look like this in that zone:

### Automatically load driver modules for Bluetooth hardware
.ifexists module-bluetooth-policy.so
#load-module module-bluetooth-policy
load-module module-bluetooth-policy auto_switch=2
.endif

Restart bluetooth and kill pulseaudio (it should respawn by itself):

$ sudo systemctl restart bluetooth
$ pulseaudio -k

Now, not only that the HSP profile will appear as available (notice the Profiles section and, also, the Active Profile)...

$ pactl list
Card #32
  Name: bluez_card.B8_F6_53_03_D4_1C
  Driver: module-bluez5-device.c
  Owner Module: 57
  Properties:
    device.description = "JBL TUNE205BT"
    device.string = "B8:F6:53:03:D4:1C"
    device.api = "bluez"
    device.class = "sound"
    device.bus = "bluetooth …
more ...

spies - Simplest Proxy I've Ever Seen

This is a simple HTTP 1.1 reverse proxy written in Python 3 that supports multiple downstream services with multiple instances. The downstream services are identified using the Host HTTP header.

The requests are load-balanced randomly or via a round-robin strategy.

The response from the downstream service is sent back to the reverse proxy.

You can run it as a

  • Python application
  • standalone Docker container
  • Docker container deployed on a Kubernetes cluster as a Helm chart
  • Docker container deployed on a Kubernetes cluster as an Operator

For more information, go to the GitHub page and read the friendly documentation.

Enjoy!

more ...

Hobot-388

Mi-am luat un robot de spălat geamuri, Hobot-388. Am multe geamuri și mi-e greu să le tot spăl, așa că m-am gândit să externalizez această sarcină. În felul acest, mi-am asigurat și un loc de top pe lista roboților, atunci când va veni momentul să se răscoale pentru că i-am exploatat. Observați c-am zis când și nu dacă.

M-a impresionat până la lacrimi (deși e unanim știut faptul că bărbații nu plâng niciodată) așa că m-am gândit să scriu o recenzie. Da... așa se scrie review în limba română...

Ce găsiți în colet?

  • robotul :)
  • cablul de alimentare
  • frânghie de siguranță, cu care poate fi legat și de care va atârna în caz că se desprinde accidental
  • vreo 8, cred, perechi de lavete
  • detergent
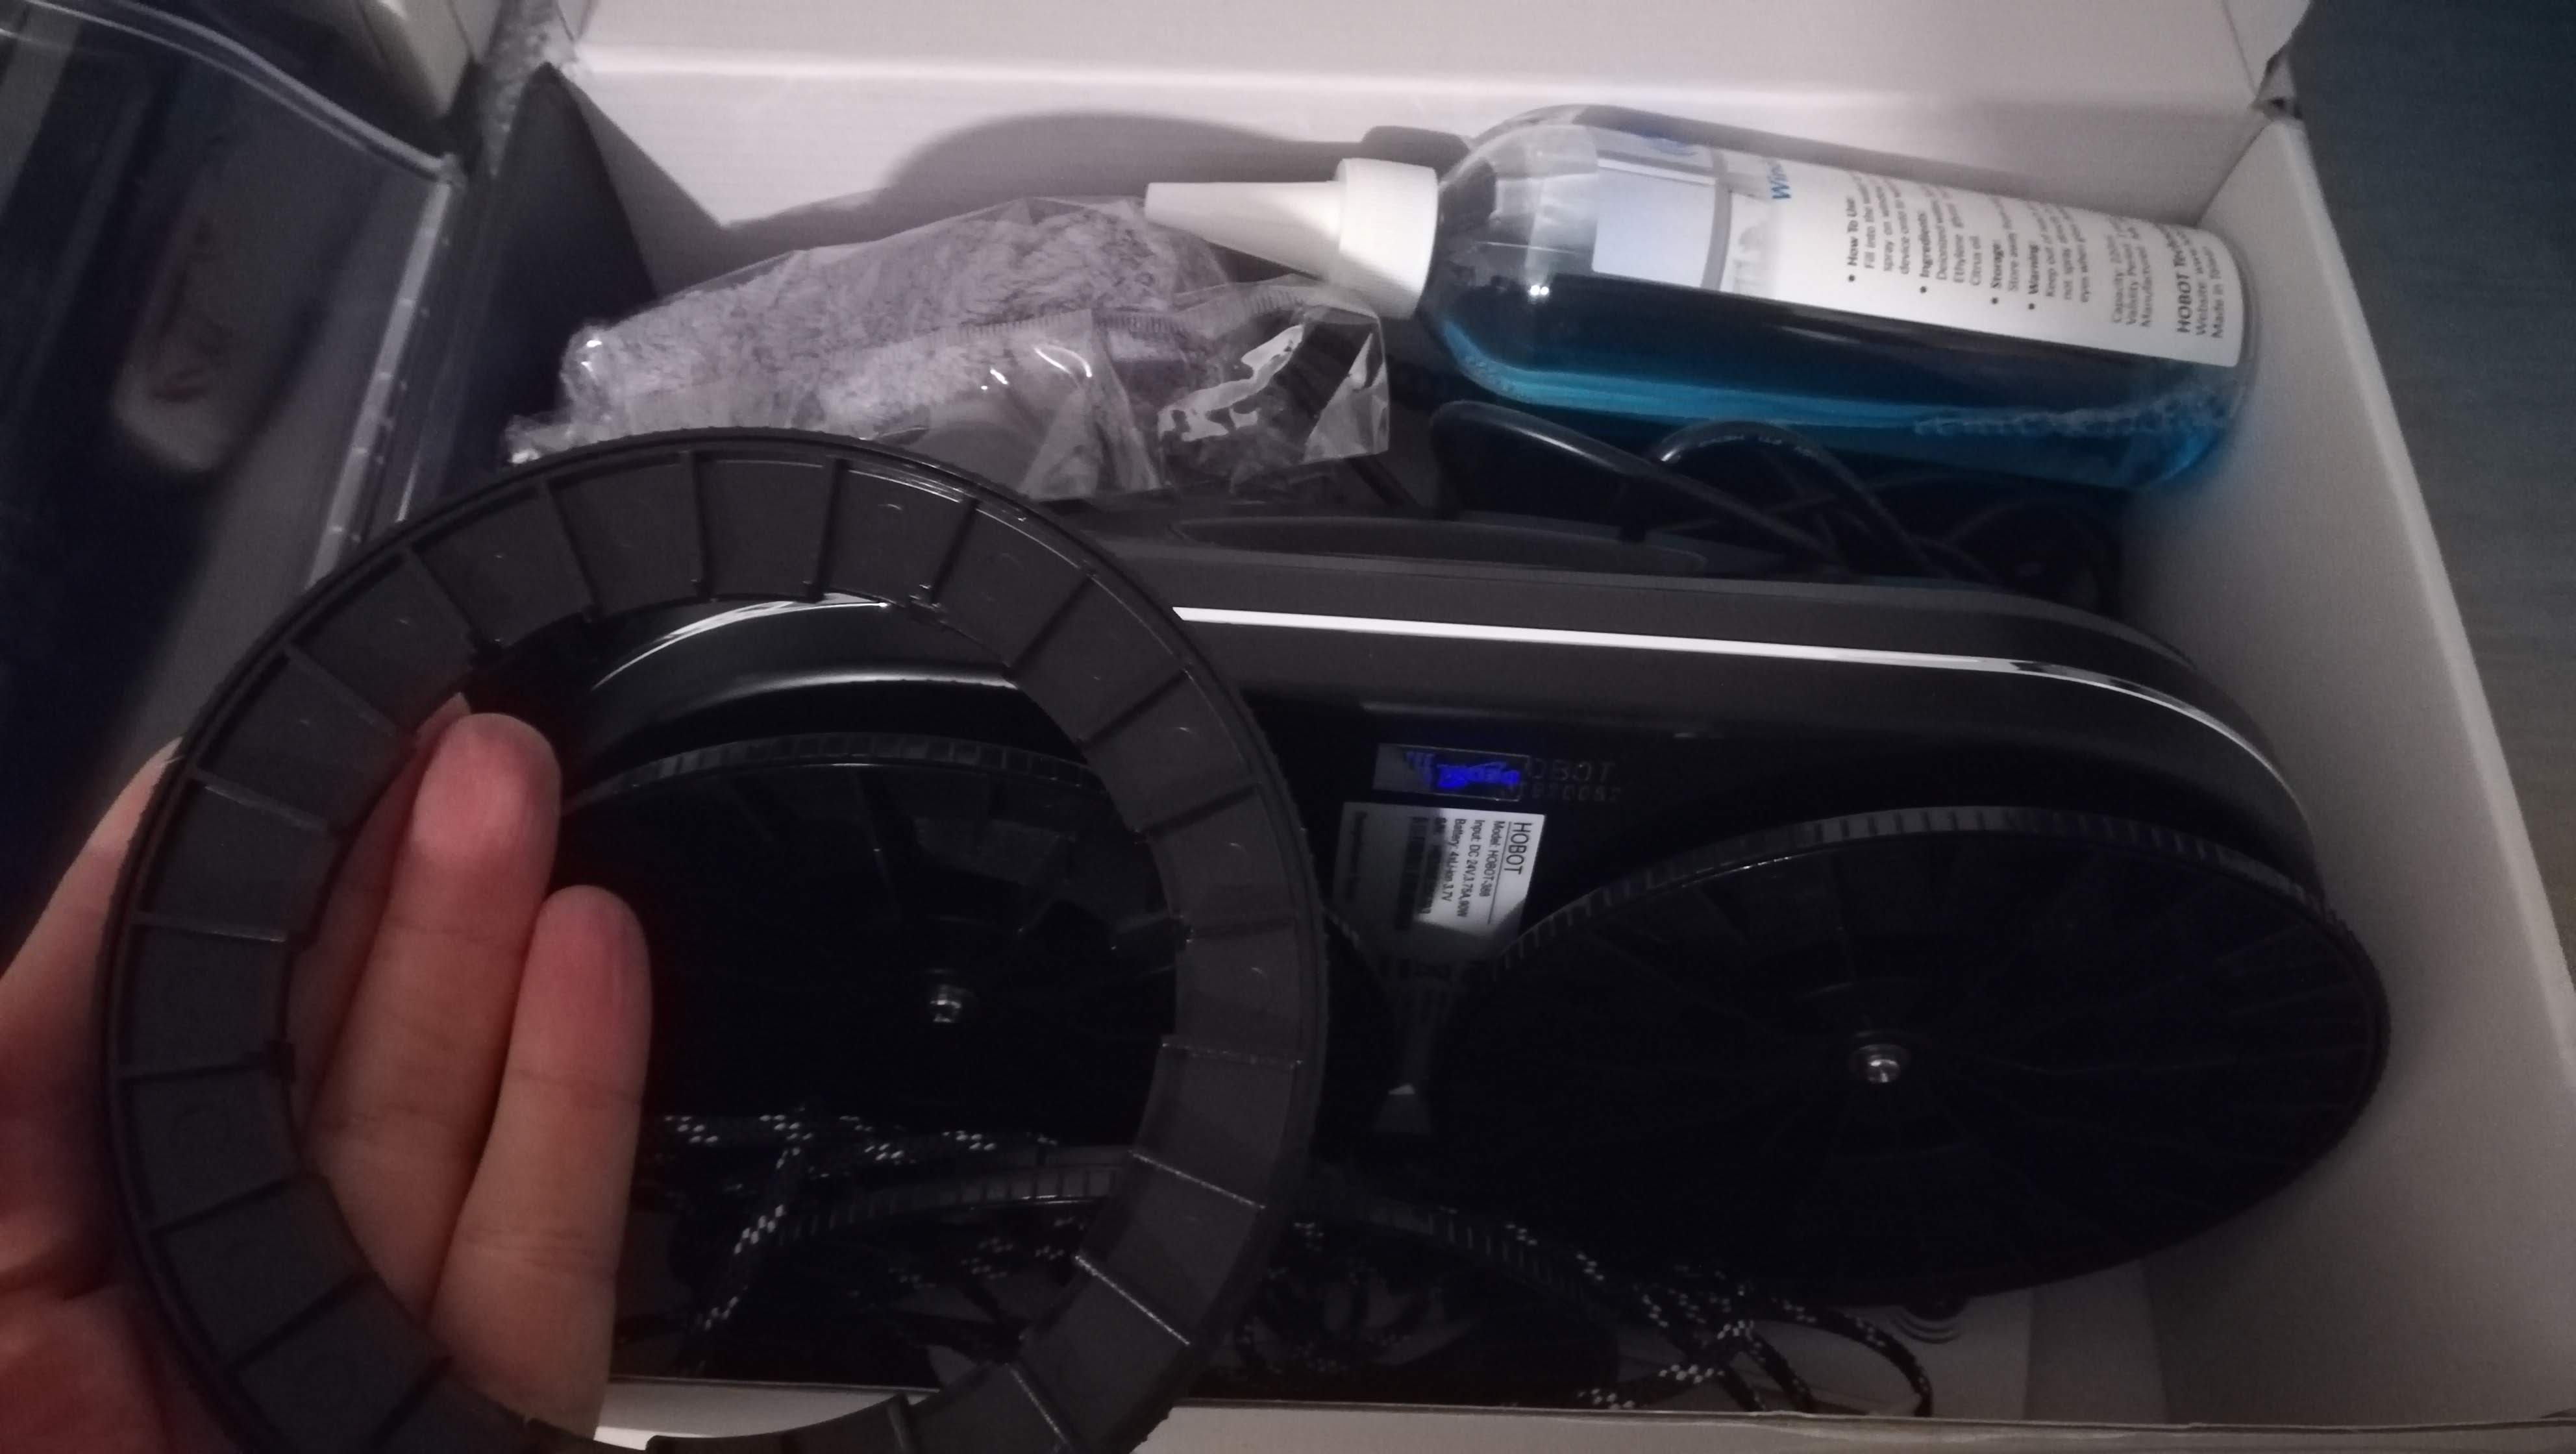
  • o pereche de "picioare" (discurile pe care se prind lavetele și care țin robotul pe geam)
  • un pulverizator de rezervă
  • telecomanda
  • manual de utilizare
  • și-o ciocolățică (mda... ca-n bancul ăla; da' poate depinde și de unde-l comandați)

ce-i in cutie

Vă recomand să vă mai comandați un set de lavete și niște detergent extra.

Ni la el!

Dihania se prinde de geam făcând vid și, apoi, începe să își croiască drum prin jeg. Prima tură trebuie pus să curețe uscat. Apoi, tura (sau turele) următoare, trebuie pus cu apă și/sau detergent și/sau spirt.

Am făcut și chestii nesăbuite

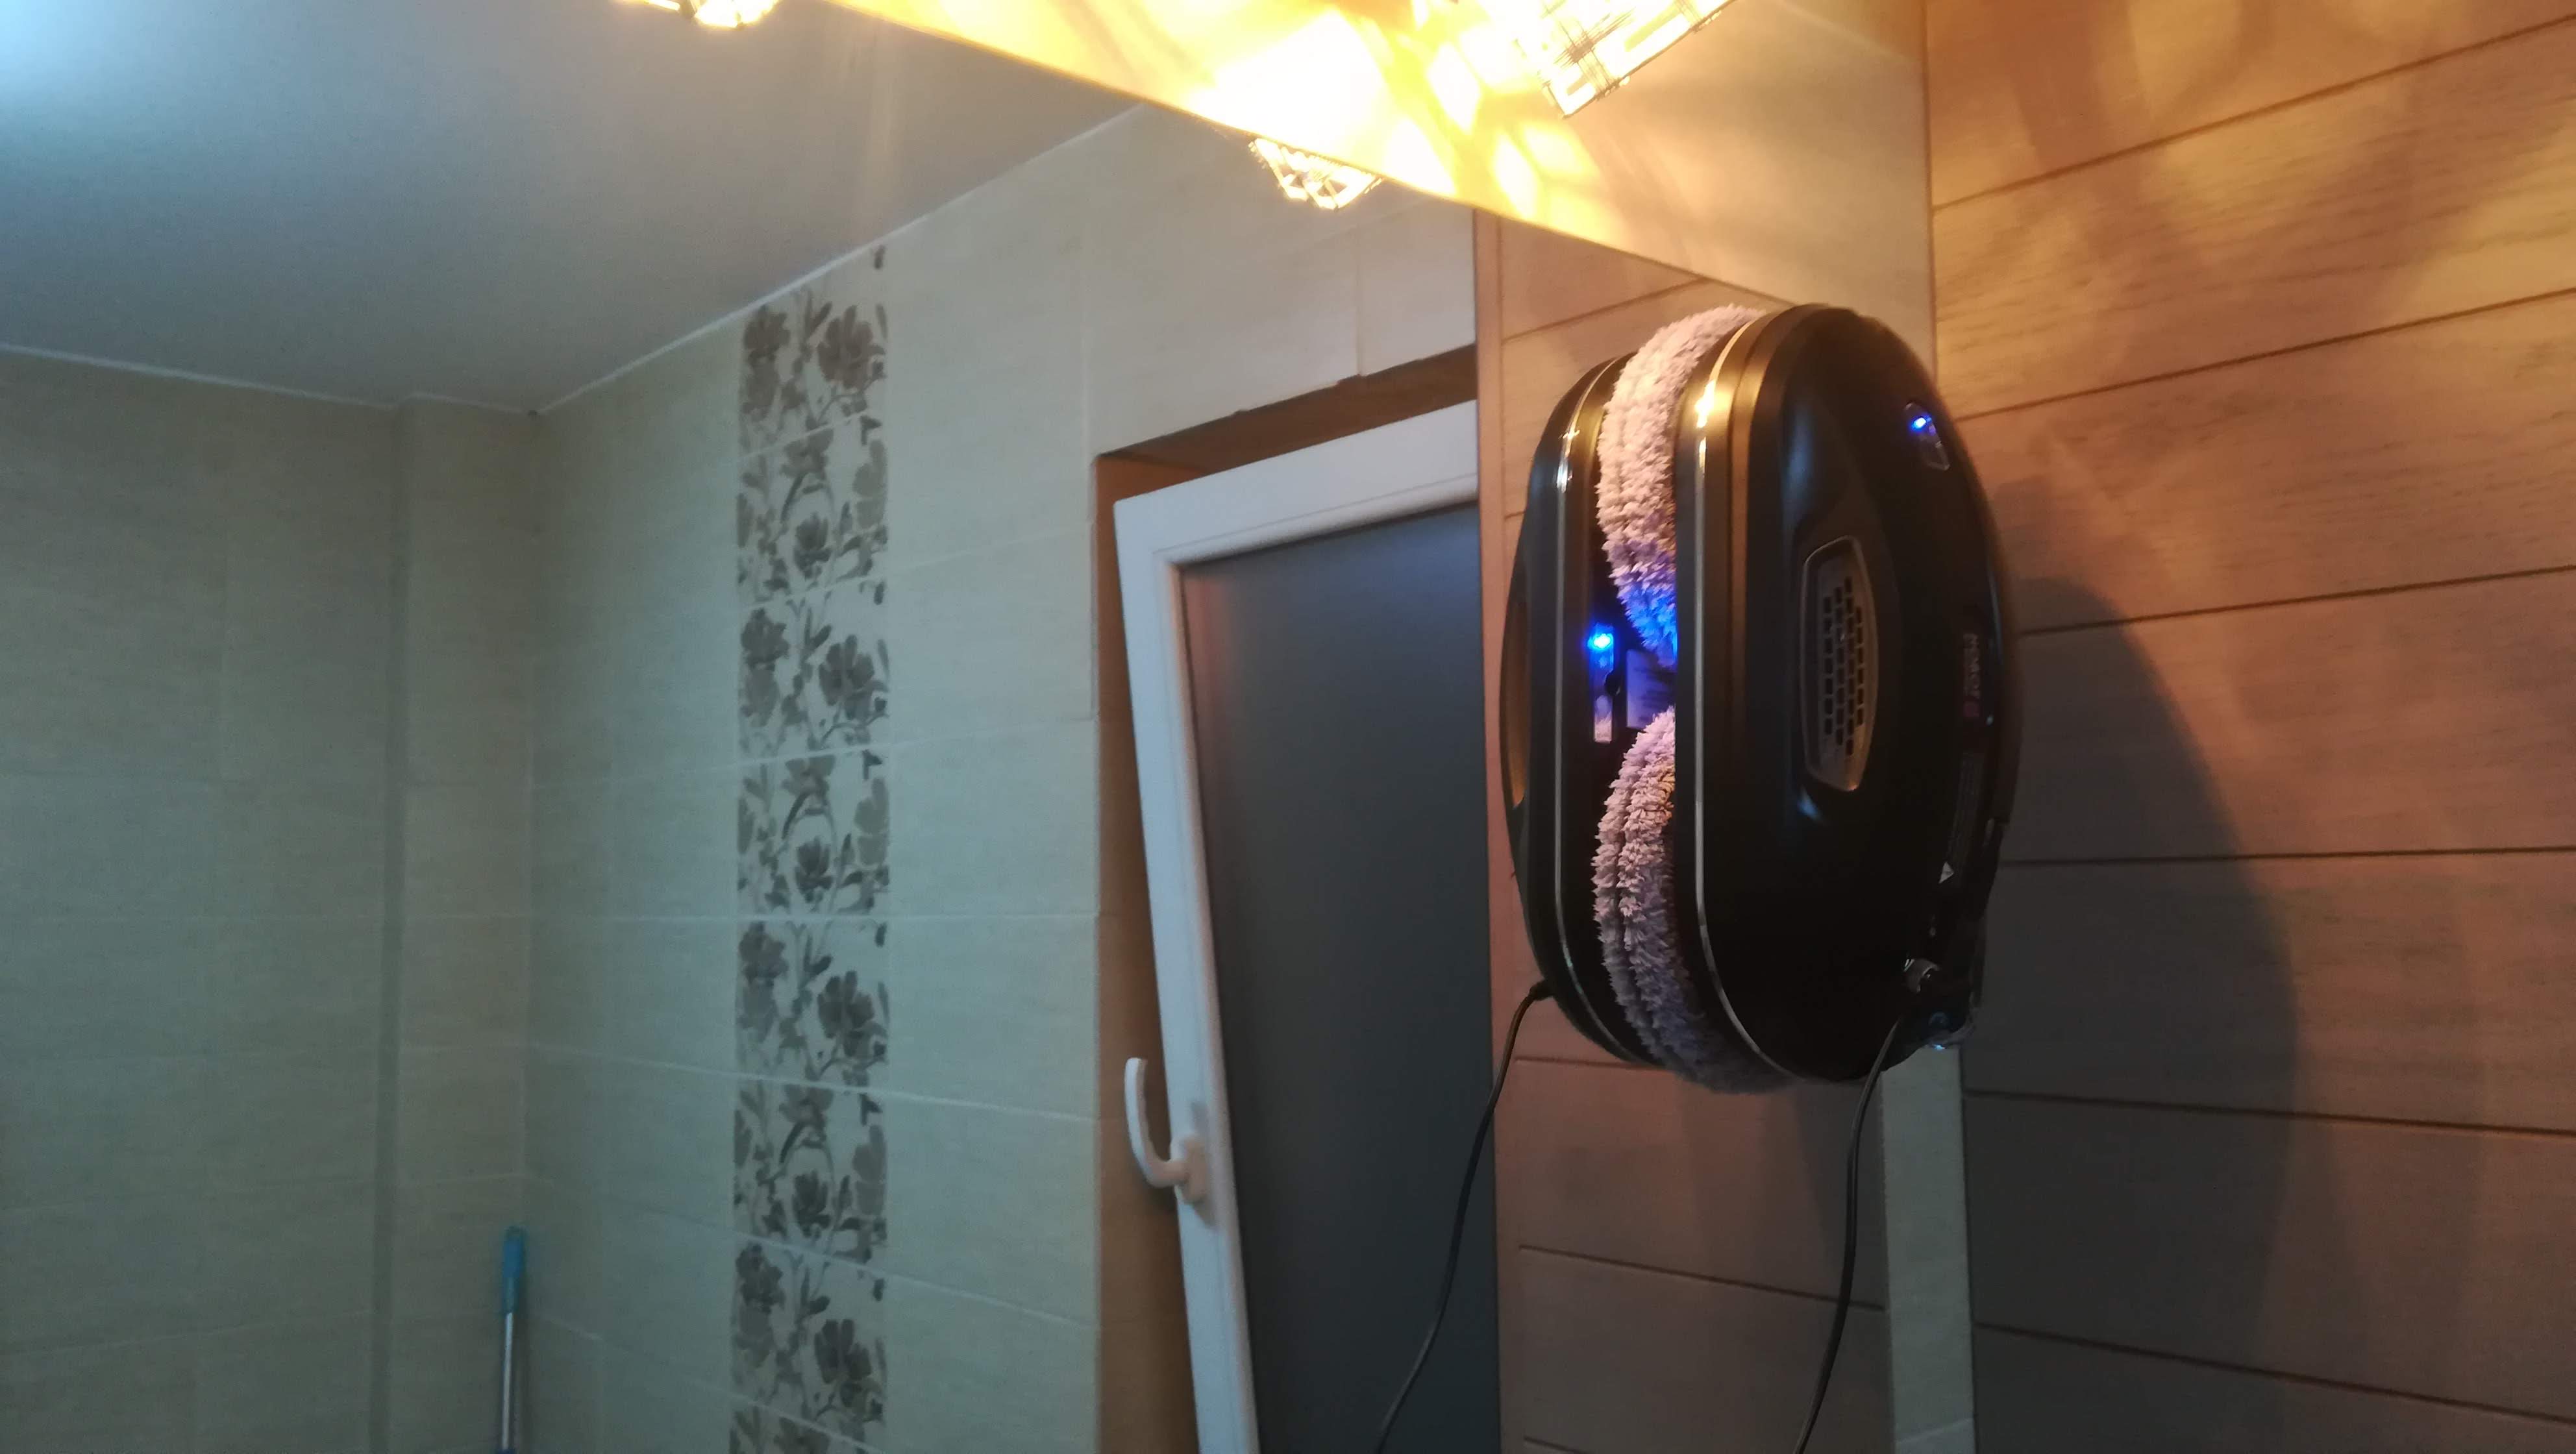
Adică l-am pus pe sticlă fără margine (sticla de la cabina de duș, oglindă). Scrie clar pe el să nu faci asta, dar, cu supraveghere se poate și își dă seama, în majoritatea cazurilor, c-a ajuns la margine.

pe oglindă

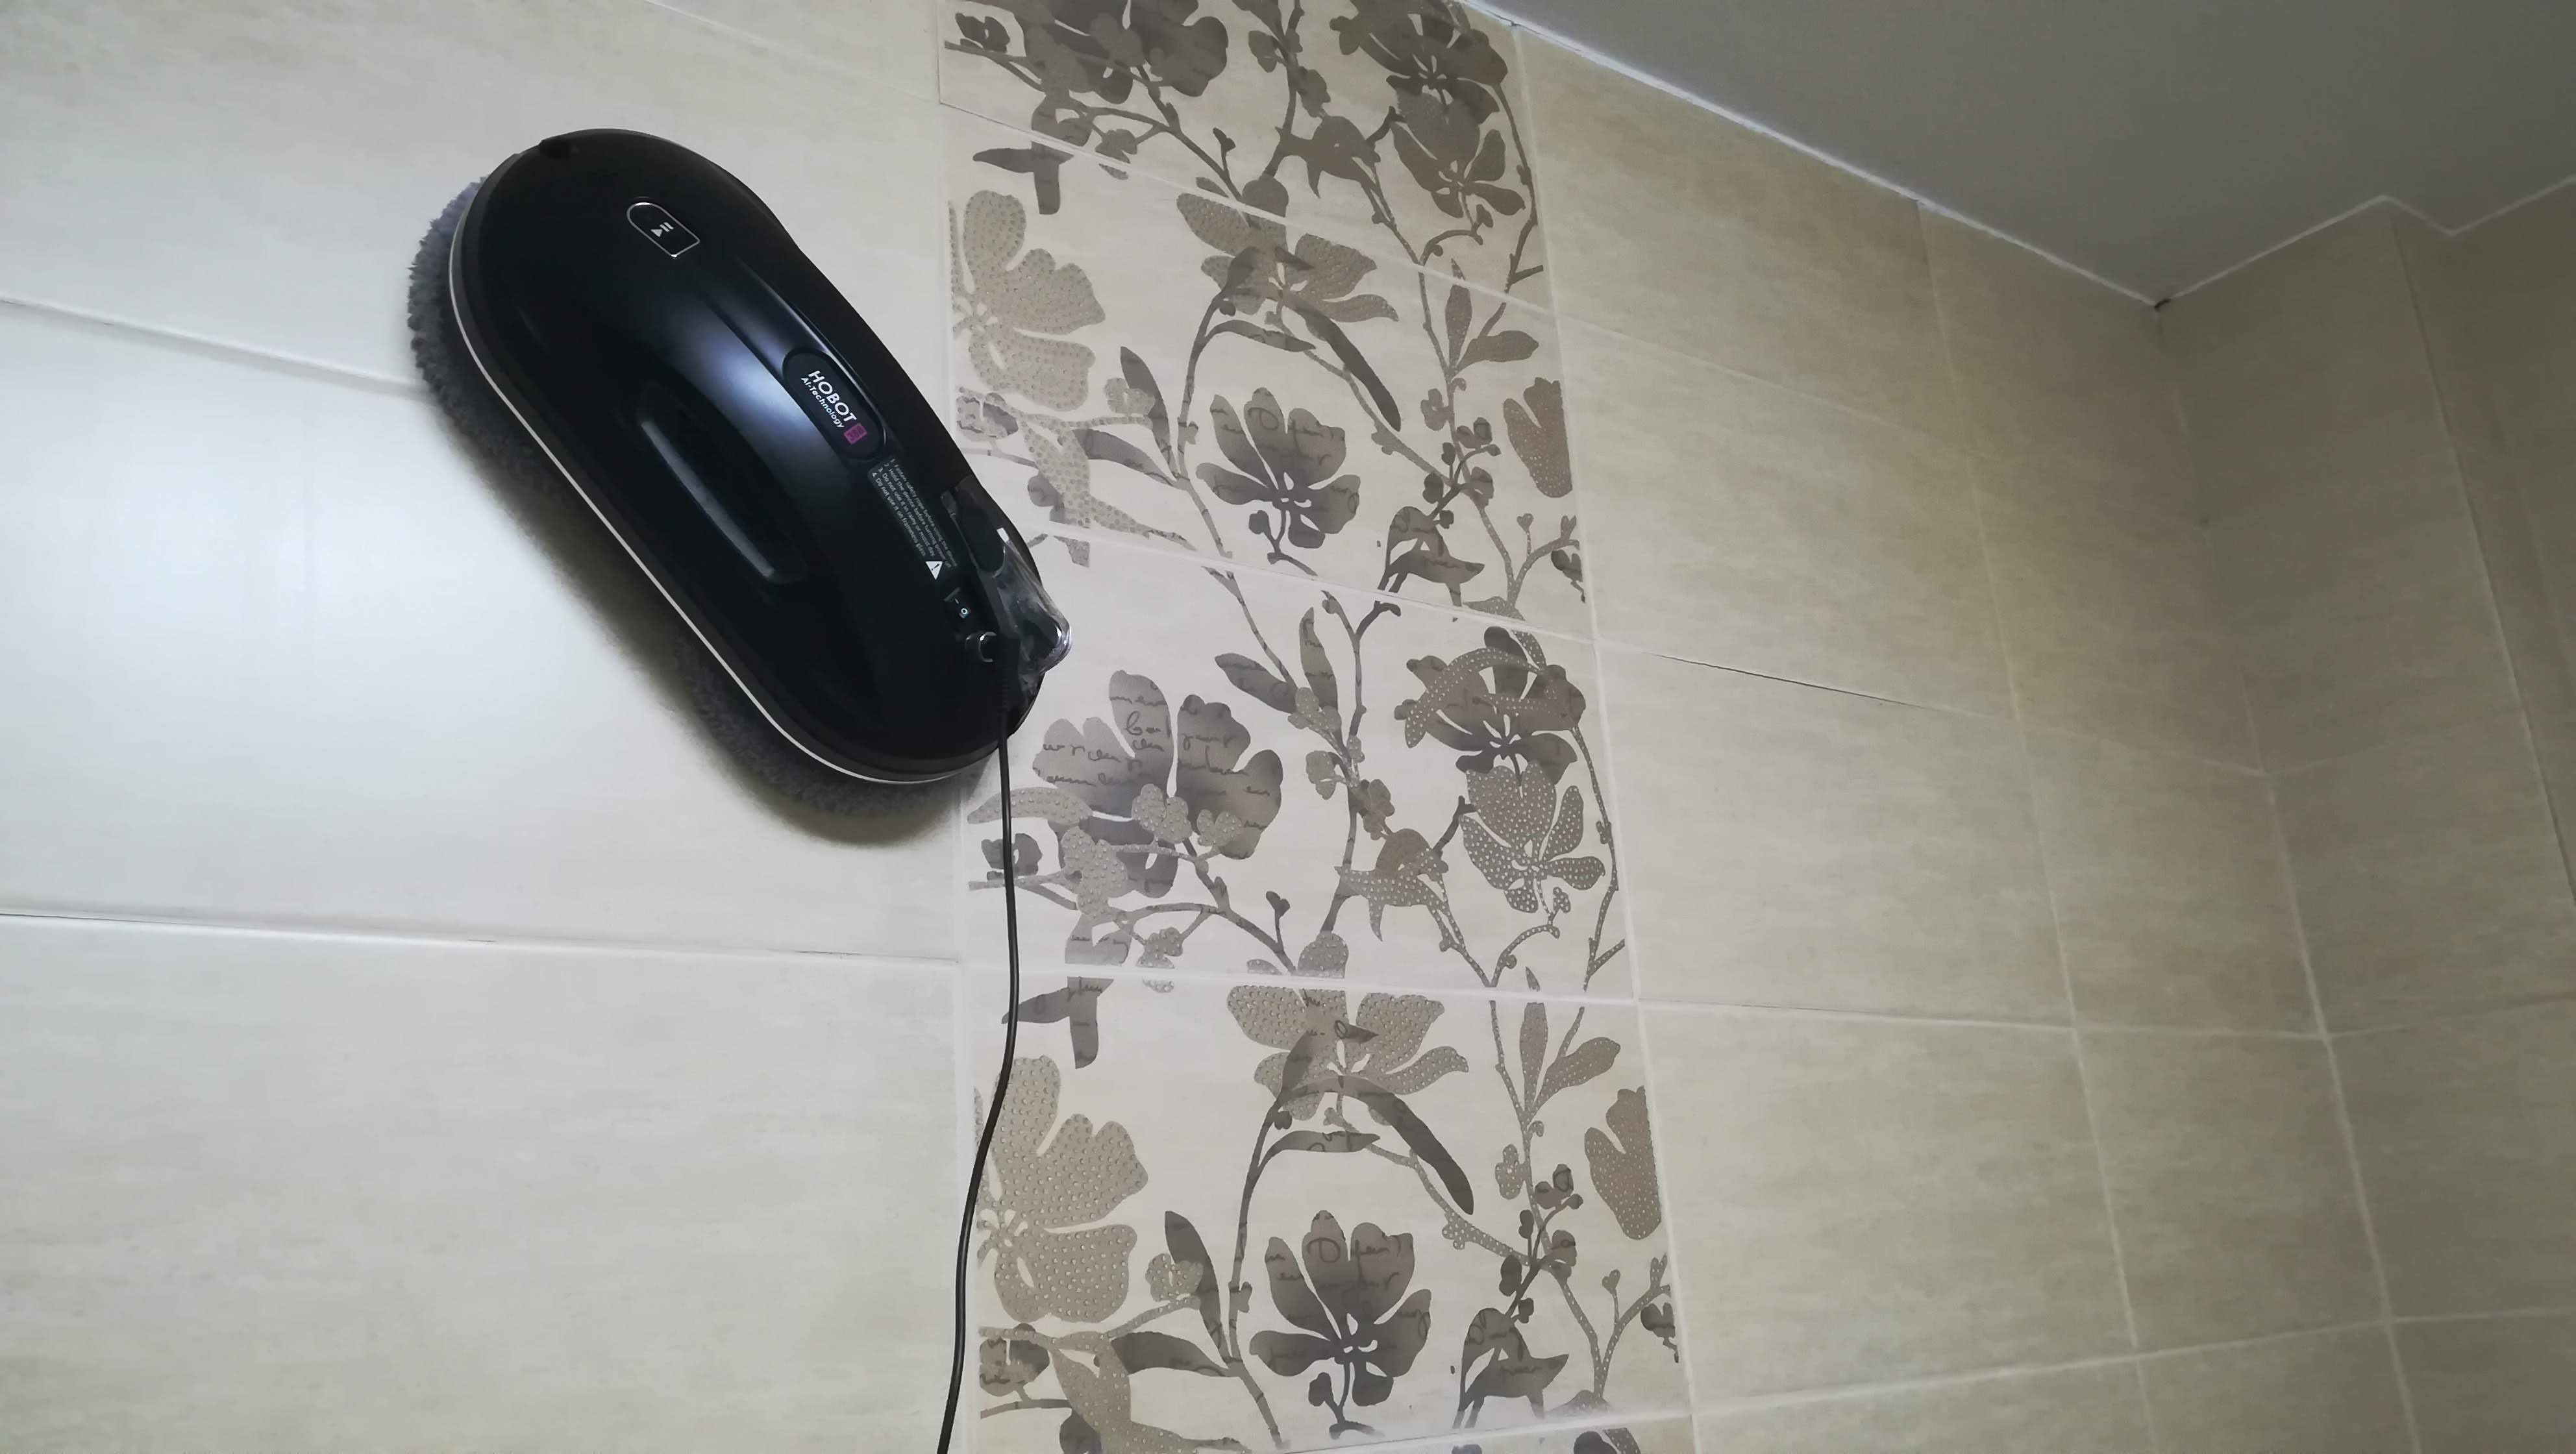
L-am pus si pe faianță. Cică asta-i una dintre caracteristicile cu care acest model vine în plus față de cele anterioare. Se ține bine, n-a căzut, dar mi se pare că trebuie supravegheat, mai ales că nu am de ce să-i leg frânghia de siguranță.

pe faianță

Ah... Și să nu uit: în cazul în care "i se ia lumina", robotul are un UPS (o baterie) care-i va permite să stea prins de suprafața pe care se afla la momentul în care a fost surprins de neplata facturii încă aproximativ 20 de minute.

Funcții faine de pe telecomandă

2X

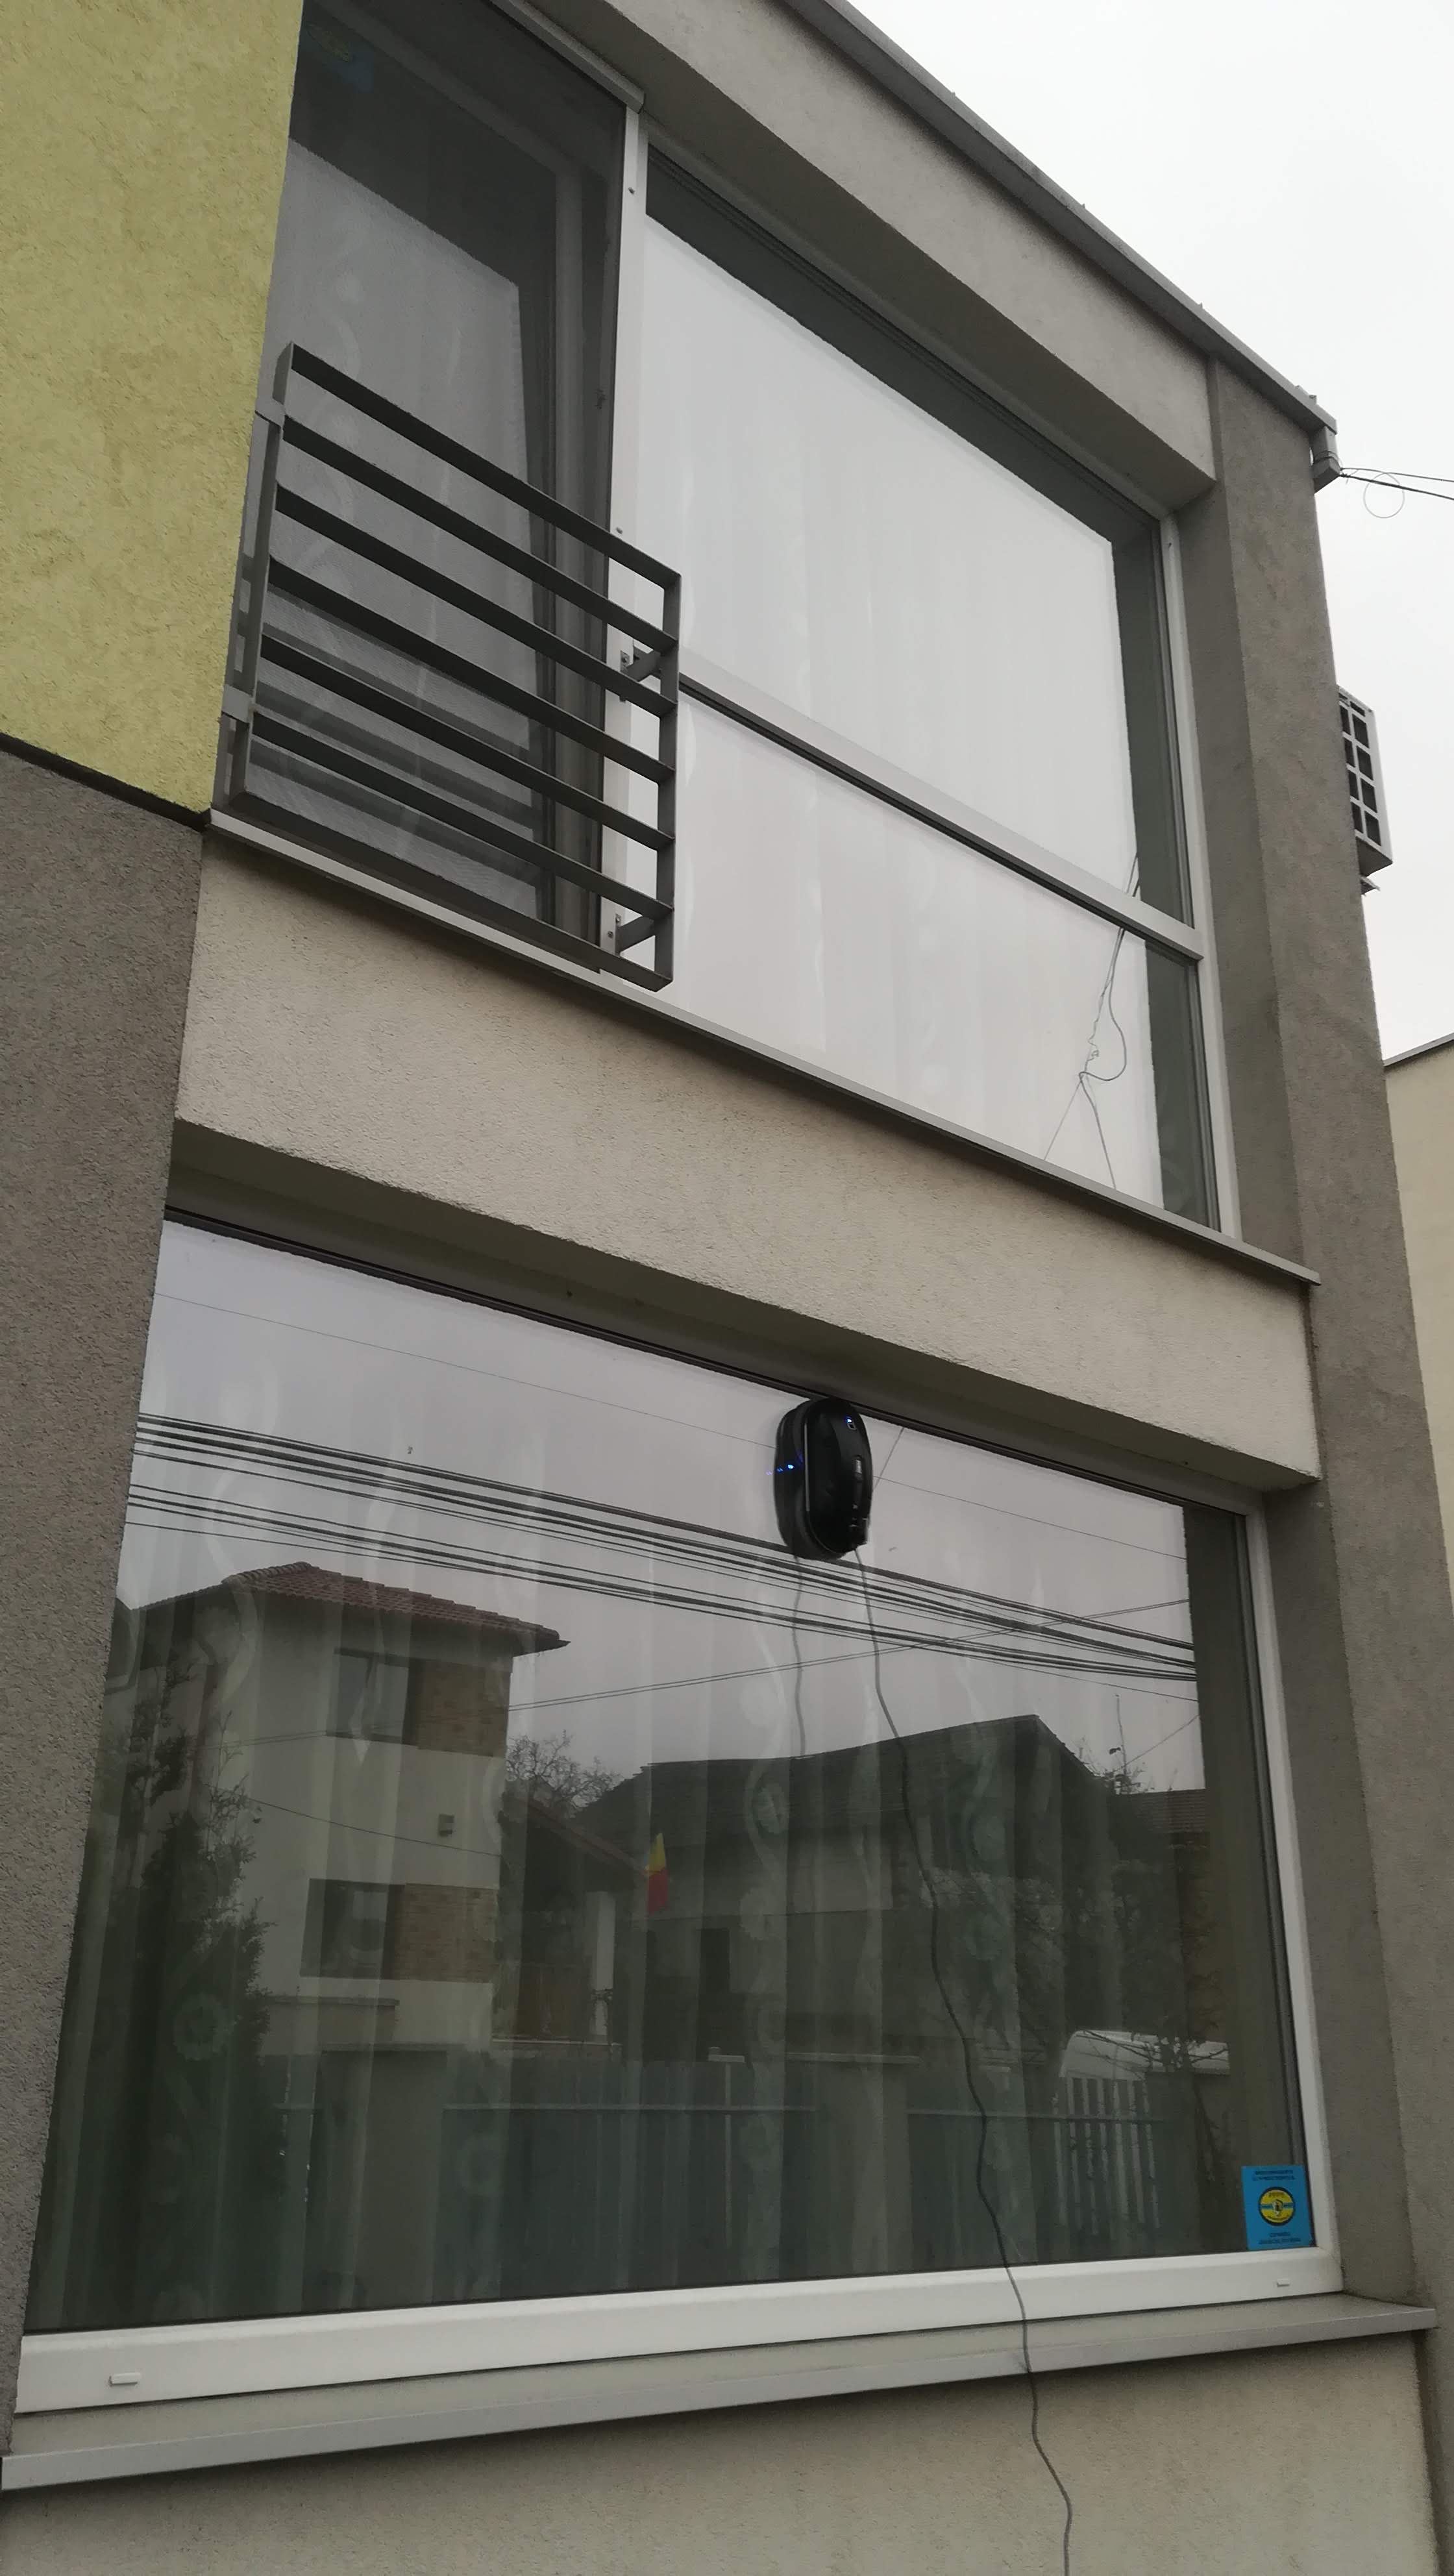
Asta-i super utilă mai ales dacă locuiești într-un palat de cleștar, ai dormit ultimii 100 de ani și deodată afli că vine prințul. După ce pui robotul pe geam, apeși 2X pe telecomandă și robotul va spăla geamul de... 2 ori. Uau!

pe geam

Săgețile de ghidare și opțiunea de pulverizare extra

În cazul în care vreți să insiste într-o anumită zonă, puteți să-l ghidați cu săgețile, acolo. În plus, puteți să pulverizați detergent în plus în acea zonă.

Pentru geamurile fără margine, dacă ajunge la margine și nu cade, e posibil să devină "derutat" și să nu știe încotro să continue. Drept urmare, poate fi ghidat din telecomandă.

Tot cu săgețile puteți duce robotul într-o zonă a geamului de unde să-l puteți lua (în cazul în care termină curățenia dar rămâne într-o zona inaccesibilă).

Concluzii

Eu zic să vă luați, mai ales dacă aveți multe geamuri …

more ...


Echo server in Elixir used in a CI/CD Pipeline

This project was used during an internship workshop. The Elixir code (the echo server) was not written by me. I only added the unit tests.

You can go through the workshop and learn how to

  • create a local Jenkins server with Docker
  • spin a few virtual machines (with Hyper-V or VirtualBox) with Docker machine
  • create a Docker Swarm with those virtual machines
  • connect Jenkins to the Swarm
  • create a pipeline to build, test and deploy the echo server in the Swarm

The code and its documentation can be seen in

more ...

Chef & AWS OpsWorks Workshops

Since I've used Chef a lot, especially with AWS OpsWorks, I've had the chance of presenting this setup.

In 2015, during a MeetMagento event, I showed this presentation, followed by a workshop. The code can be seen on GitHub and it uses Chef in order to spin up an AWS OpsWorks stack and deploy a PHP application on it

In 2017, during an event called Rise of the DevOps, I delivered a similar presentation that did kinda the same thing. Here's the code.

more ...

Rezolvarea cubului Rubik

I. Introducere şi motivaţie

Salut şi bine ai venit pe pagina aceasta. Mi-am propus să îţi arat aici o metodă de rezolvare a cubului Rubik. “De ce-ai face una ca asta?”, ar putea întreba cineva. Păi hai să studiem puţin acest cub, ca să vezi câteva motive.

A fost inventat în 1974 de Ernő Rubik, un sculptor şi arhitect ungur. Este considerată cea mai bine vândută jucărie din lume, fiind cunoscut şi sub denumirea “cubul magic”. După unele statistici 1 din 4 oameni s-a “jucat” cel puţin o dată cu un cub Rubik. Şi cu siguranţă fiecare om care s-a jucat vreodată cu el (cubul, nu cu el însuşi!) a vrut să ştie să-l rezolve.

Din păcate documentaţie de calitate, în limba română, nu există. Cea în engleză e de multe ori confuză, incompletă sau greu de găsit. În plus, pentru copii, documentaţia în limba engleză e foarte greu de înţeles.

Sper ca ce scriu mai jos, să fie pe înţelesul tuturor. Metoda de rezolvare pe care o expun aici e o “compilaţie” din mai multe metode pe care le-am studiat. E logică şi uşor de reţinut, dar nu e foarte rapidă.

Ca să-ţi fie mai uşor, am creat şi filmuleţe pentru fiecare pas în parte. Întregul playlist poate fi găsit aici.

Să-i dăm drumul!

II. Noţiuni de bază

În cele ce urmează vom lucra cu un cub standard (3×3x3). Acest cub are:

  • 6 feţe, fiecare de altă culoare. Le vom nota cu câte o literă, aşa cum sunt notate ele în documentaţia de specialitate:
    • U – faţa de sus (upper face)
    • D – faţa de jos (down face)
    • R – faţa din dreapta (right face)
    • L – faţa din stânga (left face)
    • F – faţa din... faţă... dinspre tine (front face)
    • B – faţa din spate (back face)

Evident, orice faţă poate fi cea de sus, sau cea din dreapta. Dar o dată ce ai început să rezolvi cubul şi ai ales ca faţa albă să fie cea de sus şi cea verde cea din dreapta, nu le mai schimba! Nu roti cubul în mână în timp ce îl rezolvi. E cea mai comună greşeală şi totodată cea mai gravă pentru că uiţi secvenţa de mutări pe care trebuie să o faci!

Cu orice faţă se pot face 3 tipuri de rotiri: o rotire în sensul acelor de ceas, o rotire în sens opus acelor de ceas (sens trigonometric, cum se numeşte în geometrie) şi o rotire dublă (nu contează sensul). De exemplu, pentru faţa U, sensul acelor de ceas se notează U, sensul trigonometric U’ iar rotirea dublă se notează U². Cum se determină sensul corect pentru o faţă? Simplu: priveşti faţa respectivă în mod “natural”, centrul cubului aflându-se în spatele ei. Deci pentru a determina sensul invers acelor de ceasornic pentru faţa B, pentru câteva secunde vei întoarce cubul cu faţa B la tine (faţa F e acum în locul feţei B) şi o vei roti spre stânga, apoi vei întoarce cubul în poziţia iniţială (dacă am decis la început că faţa …

more ...

ToXic Chat

ToXic Chat was a project I started in highschool (December of 2003) with Dragoș Bucevschi. The idea was to create a cross-platform (Windows and Linux), peer-to-peer (no dependency on a specific server), reliable (TCP) chat system.

Initial implementation was done in Delphi (Windows) and Kylix (Linux) and in 2005 I rewrote it in C++/Qt but I discontinued the project.

Version history:

  • 10th of May 2004 - 0.0.1
  • 23rd of May 2004 - 0.1.0
  • 30th of August 2004 - 0.2.0
  • 1st of September 2004 - 0.2.1
  • 16th of July 2005 - 0.4
  • 25th of December 2006 - 0.5 alpha1 - this was the version in C++/Qt but I discontinued the project.

The source code, binaries, installers and screenshots can be found on Sourceforge:

more ...

QPdf2Swf

QPdf2Swf is a GUI (graphical user interface) written in Qt4 for pdf2swf, a pdf to swf converter. It was a demo that I wrote in a few hours for an interview at a company wanting to convert PDF presentation catalogs and render Flash pages from them. Flash websites were a thing in 2005 :)

I didn't get the job so I published the code online but didn't maintain it. You can view it on Sourceforge. It is cross platform and should run on both Windows and Linux (probably even Mac OS, but I didn't test)

Version history:

  • October 2005 - unreleased version, written in Qt 4.0
  • 31st of October 2006 - 0.1, the version I released, refactored in Qt 4.2
more ...

Cărămida Verde

Cărămida Verde a fost o revistă-pamflet scrisă în liceu. A avut 8 numere și un manifest.

Echipa permanentă era formată din:

  • 4 redactori şefi: Syl (eu), BOGGHY (Bogdan Bucevschi), m0|3 (Andrei Şanta) şi v|v (Viorel Dram)
  • 1 jurnalist (şi el şef într-un fel): GhostD (Dragoş Bucevschi)
  • 1 badigard (nu era şef, dar e clar că era cel mai tare): tony (Ovidiu Căldare)

Sediul Institutului şi al Trustului nostru de presă era format din ultimele bănci de pe rândul de la perete.

more ...